If you’ve ever made a shot list before you know how repetitive it can be adding the same shots over and over again. While laborious and time consuming, this is a necessary step to shot list your productions. I’m here to show you how creating a shot list template will save you tons of time. Follow along for a step-by-step breakdown of how to streamline shot list creation for basic coverage.
Basic Coverage
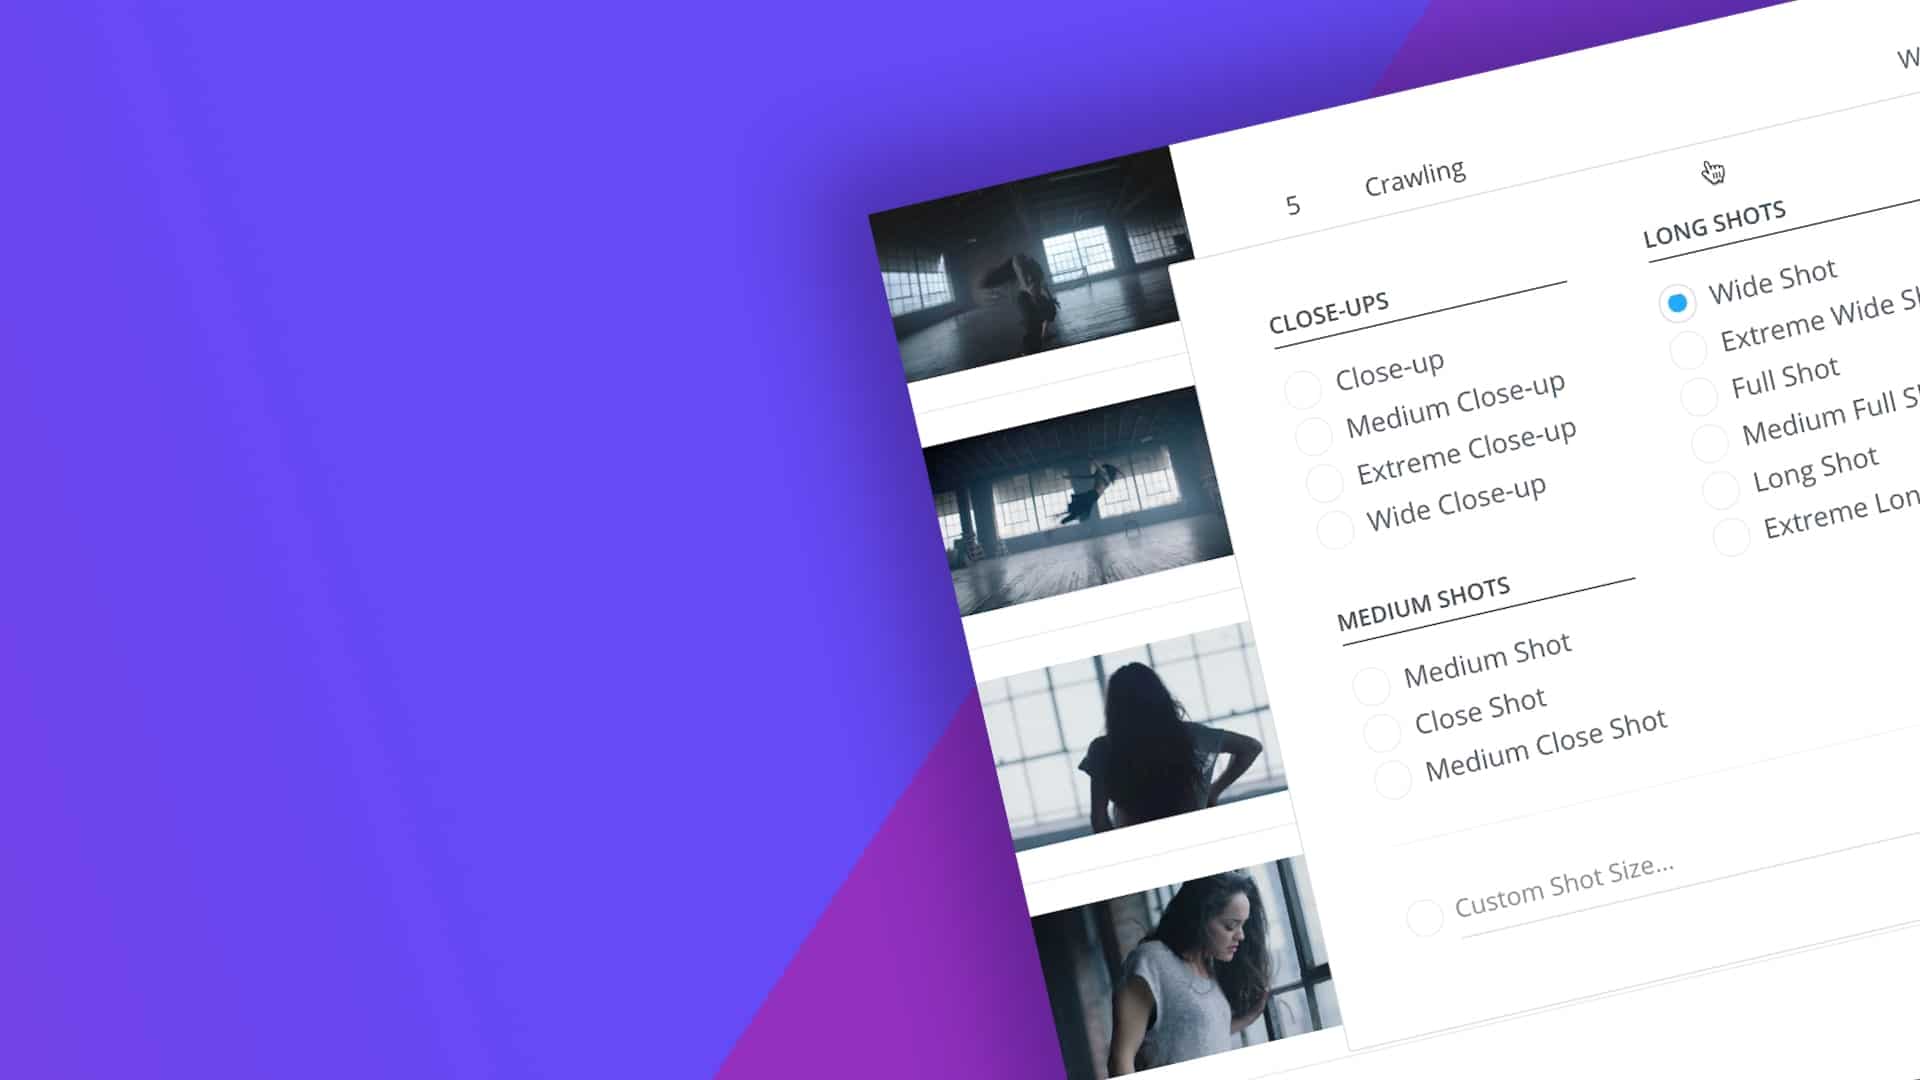
First, what’s “coverage?”
Before we dive into creating a shot list template, let’s go over what coverage means and what basic coverage for a two-person scene would include.
Coverage Definition
What is basic coverage?
Coverage is the architecture of breaking down a script into the shots that will allow the scene to be cut together. Basic coverage would then be considered the minimum number of shots needed to cover everything happening in the scene. Although coverage addresses the bare-bones question of getting shots that will cut together smoothly, it is important not to be too distracted from bigger aesthetic question of getting the right shots for the scene to work.
Basic Camera Shots for Film Coverage:
- Master or Wide Shot (WS)
- Medium Shots (MS)
- Close Ups (CU)
- Over-the-Shoulder Shots (OTS)
These are the basic camera shots when filming a two-person scene, but by no means are these end-all-be-all of the shots you can get. For a refresher on shot sizes check out the following video:
Ultimate Guide to Camera Shots • Subscribe on YouTube
Custom Shot List
Step 1: Create a shot list template
To get started, we’ll want to create a custom shot list that will become our template. Here I am on the Shot List & Storyboards page. My script has been imported and my scenes are all here on the left sidebar:
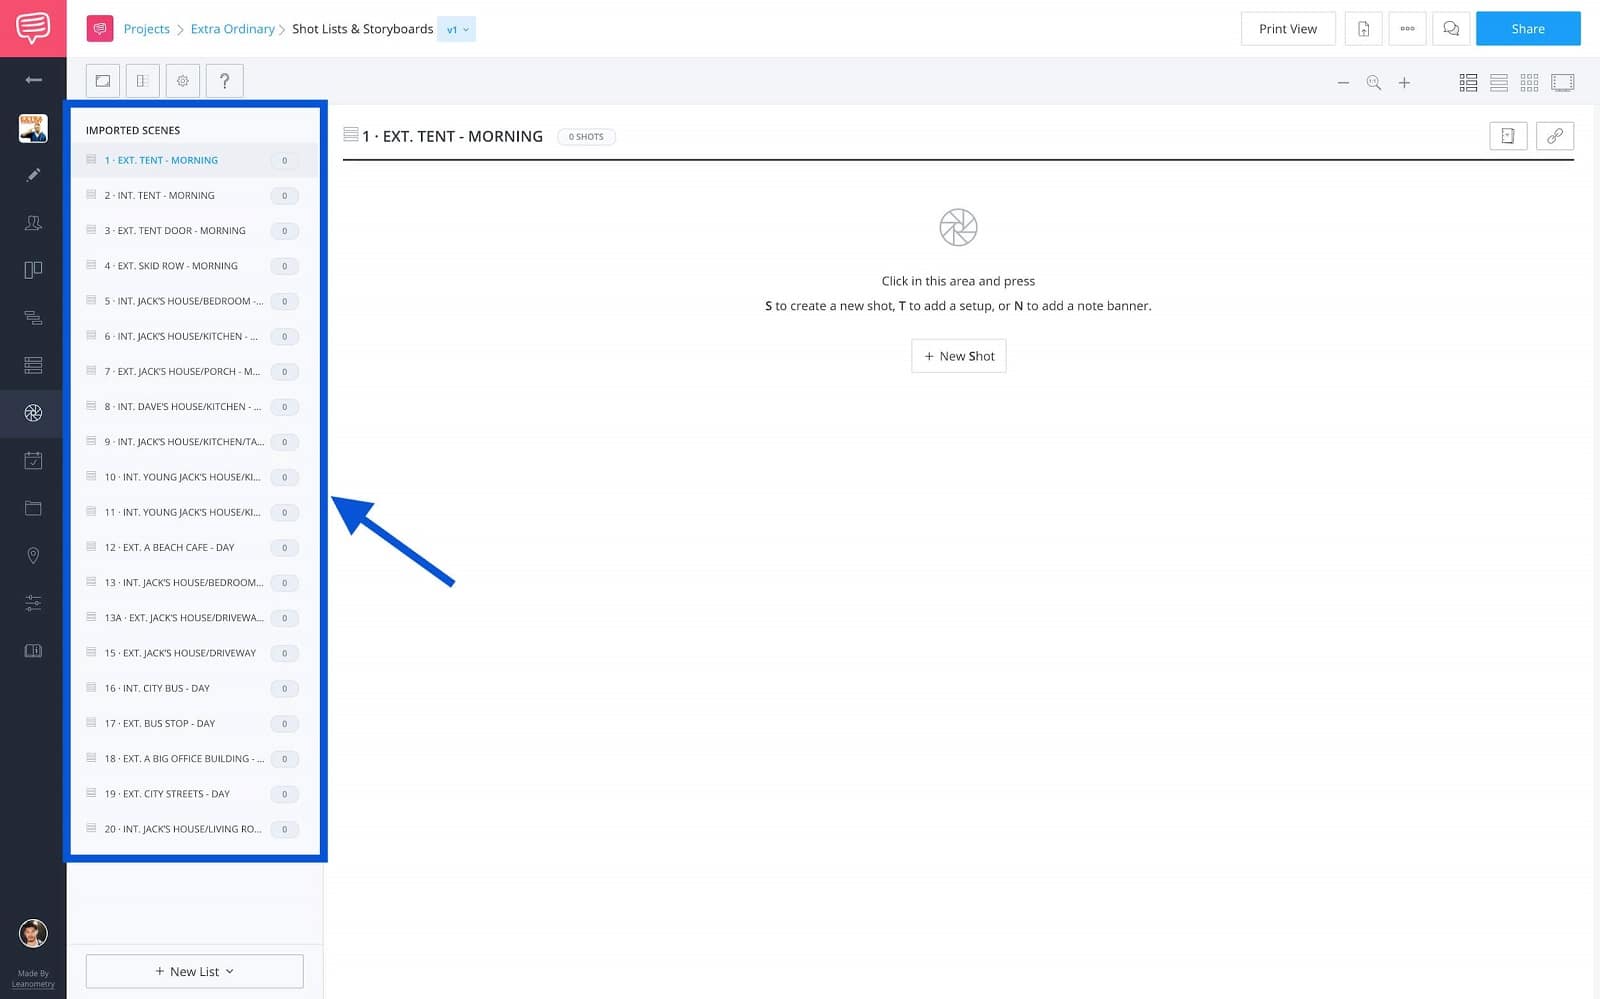
Imported Scenes Sidebar
The first thing you’ll want to do is create a custom shot list and give it a name. Click on the “+ New List” button and select “+ New Shot List.”
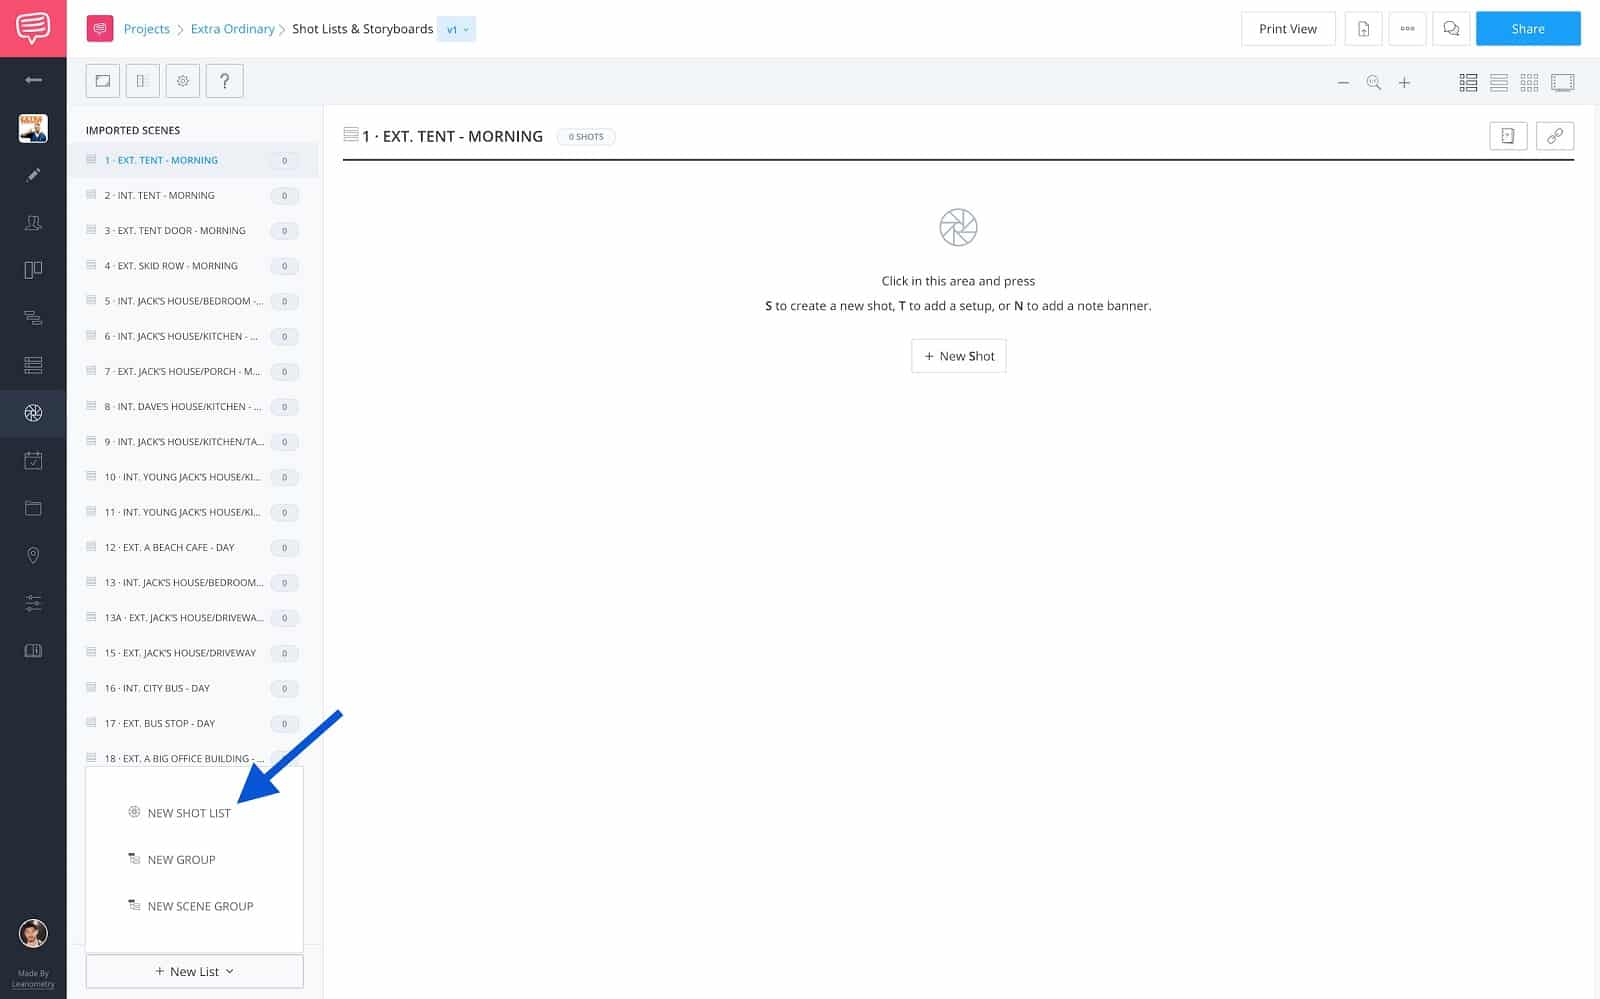
+New List • +New Shot List
Now, give the list a name. I’m going to name mine “Basic Coverage”:
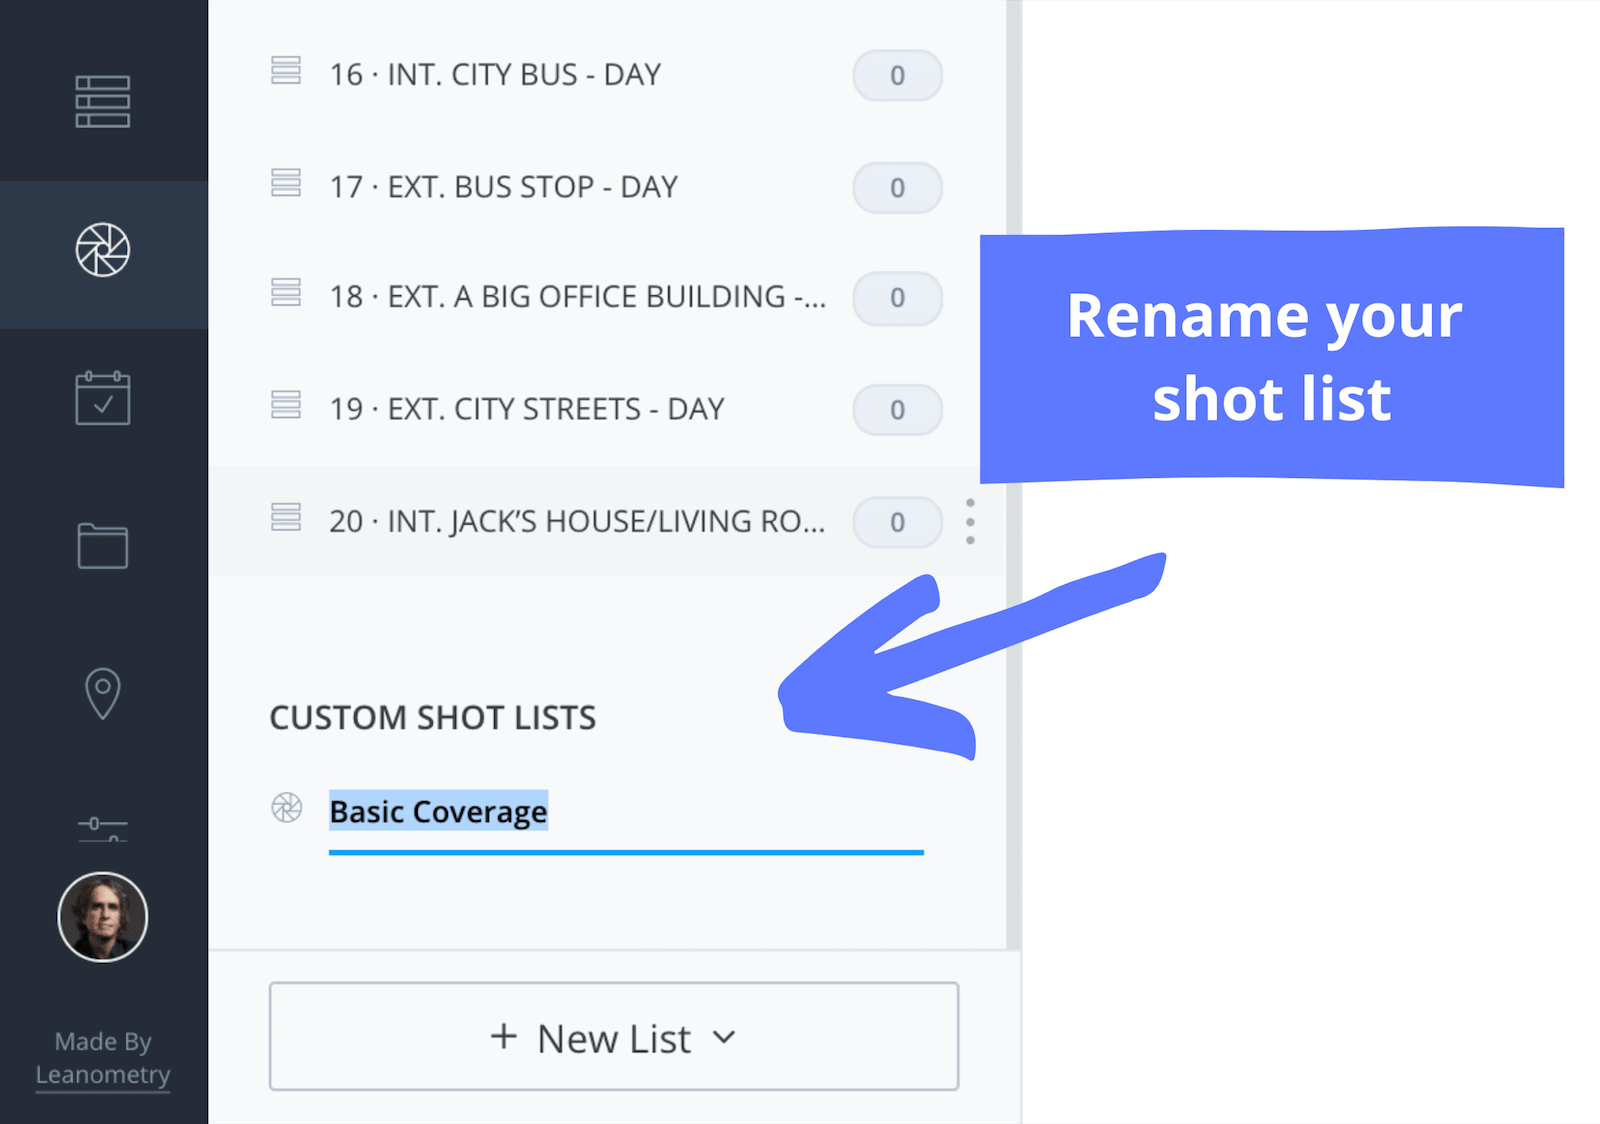
Custom Shot List • Custom Name
Now that we’ve created the custom shot list we’ll need to customize our columns. There are a number of column options that you can select or deselect at any time. In other words, you decide how detailed you want your shot list to be.
Adjust Columns
Step 2: Customize your workspace
Now that we have a shot list to use as a template, let’s customize the columns we want to display. Depending on your equipment or production requirements, the columns may need to be adjusted. For example, you may generally have a preference to shoot your coverage with specific lenses, so you can enable the “Lens” column if you like.
Personally, I like to shoot my close-ups with a 30mm lens, so I’m going to enable the Lens column.
On the toolbar, click the Shot Specs button:
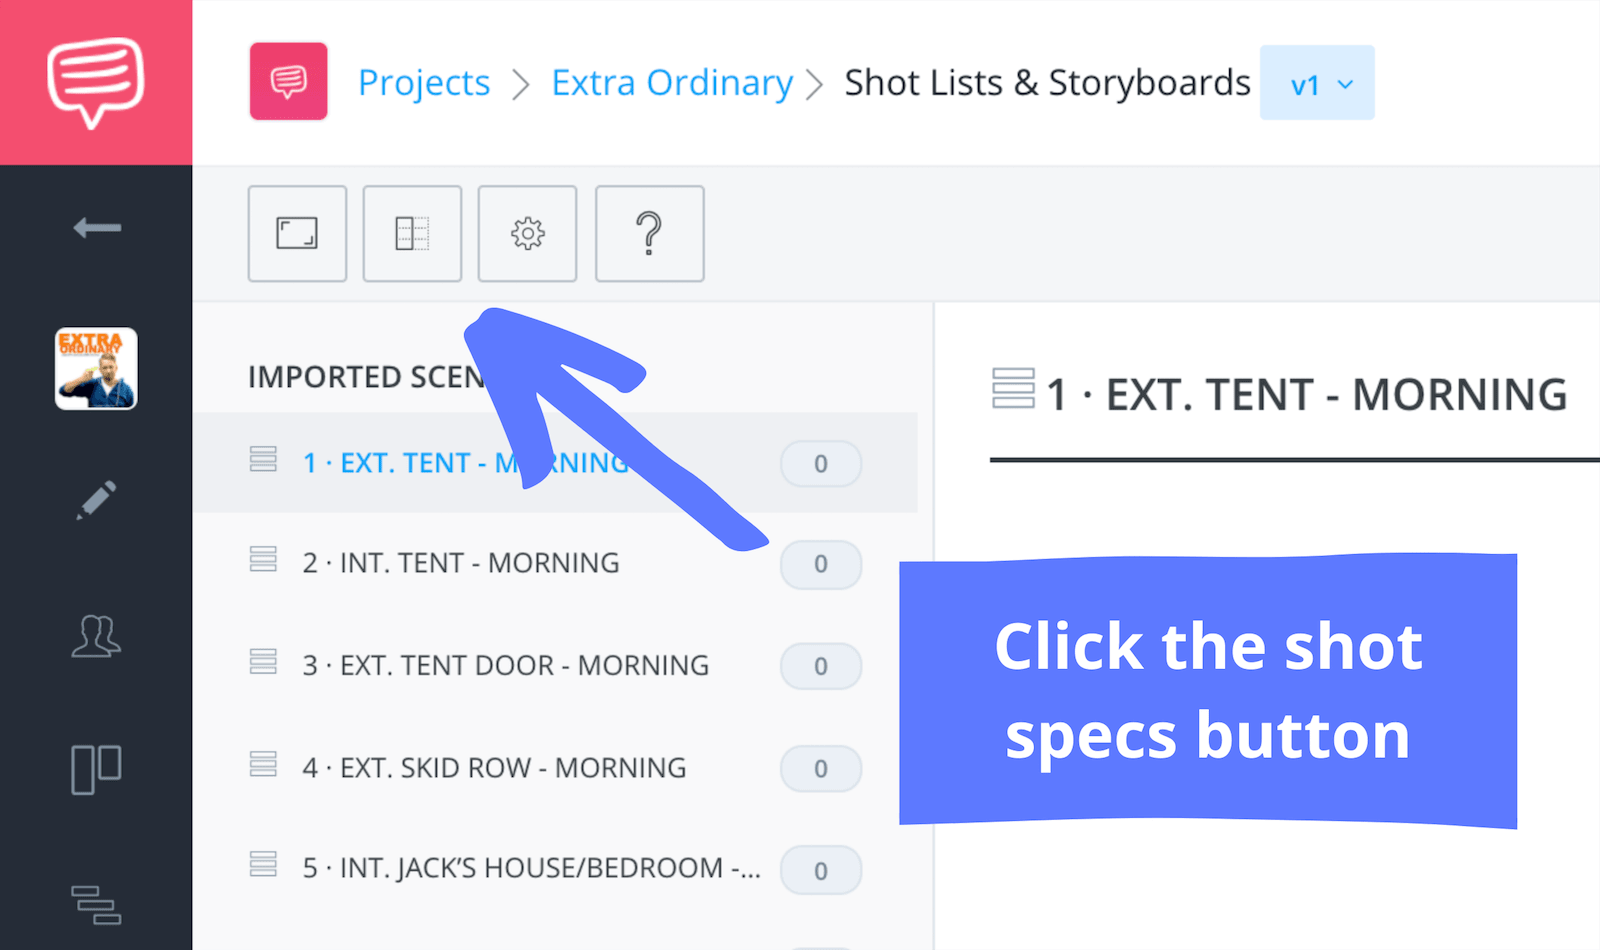
Shot List & Storyboards • Columns
In the pop up window, select or deselect the shot specs you would like to be shown or not.
Note: This is non-destructive, so you can enable and disable columns and the information will be retained.
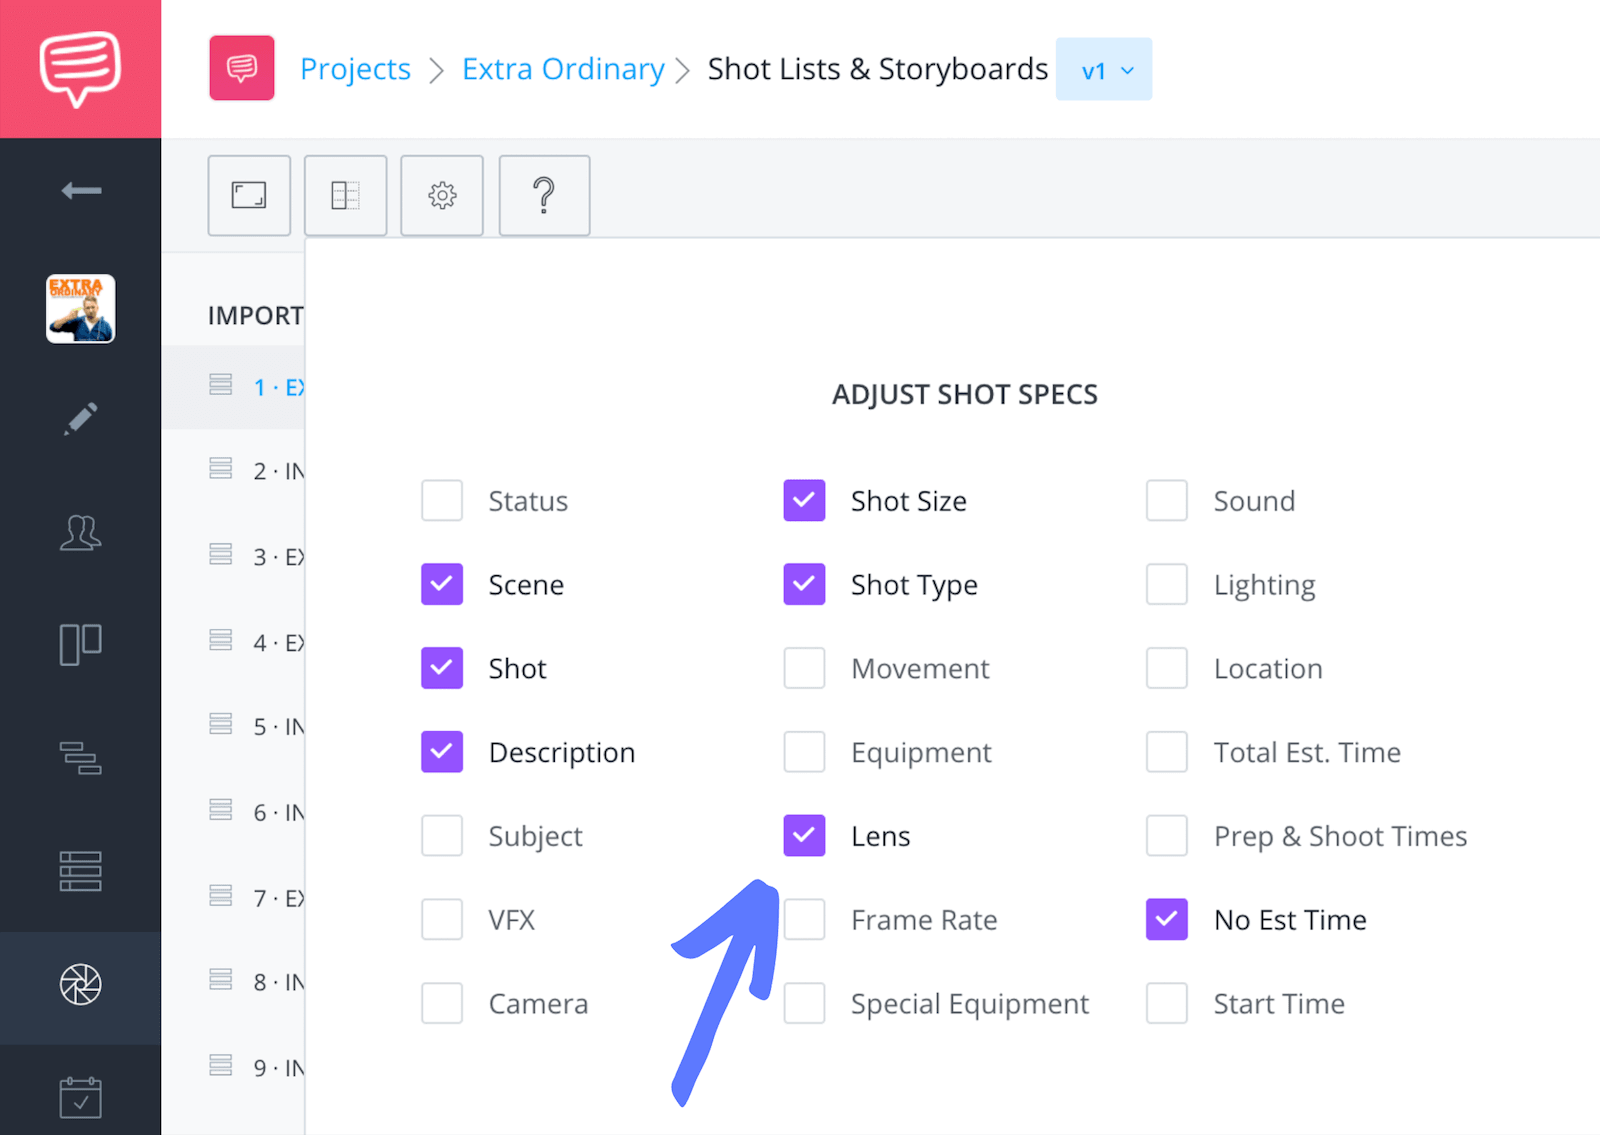
Shot List & Storyboards • Shot Specs
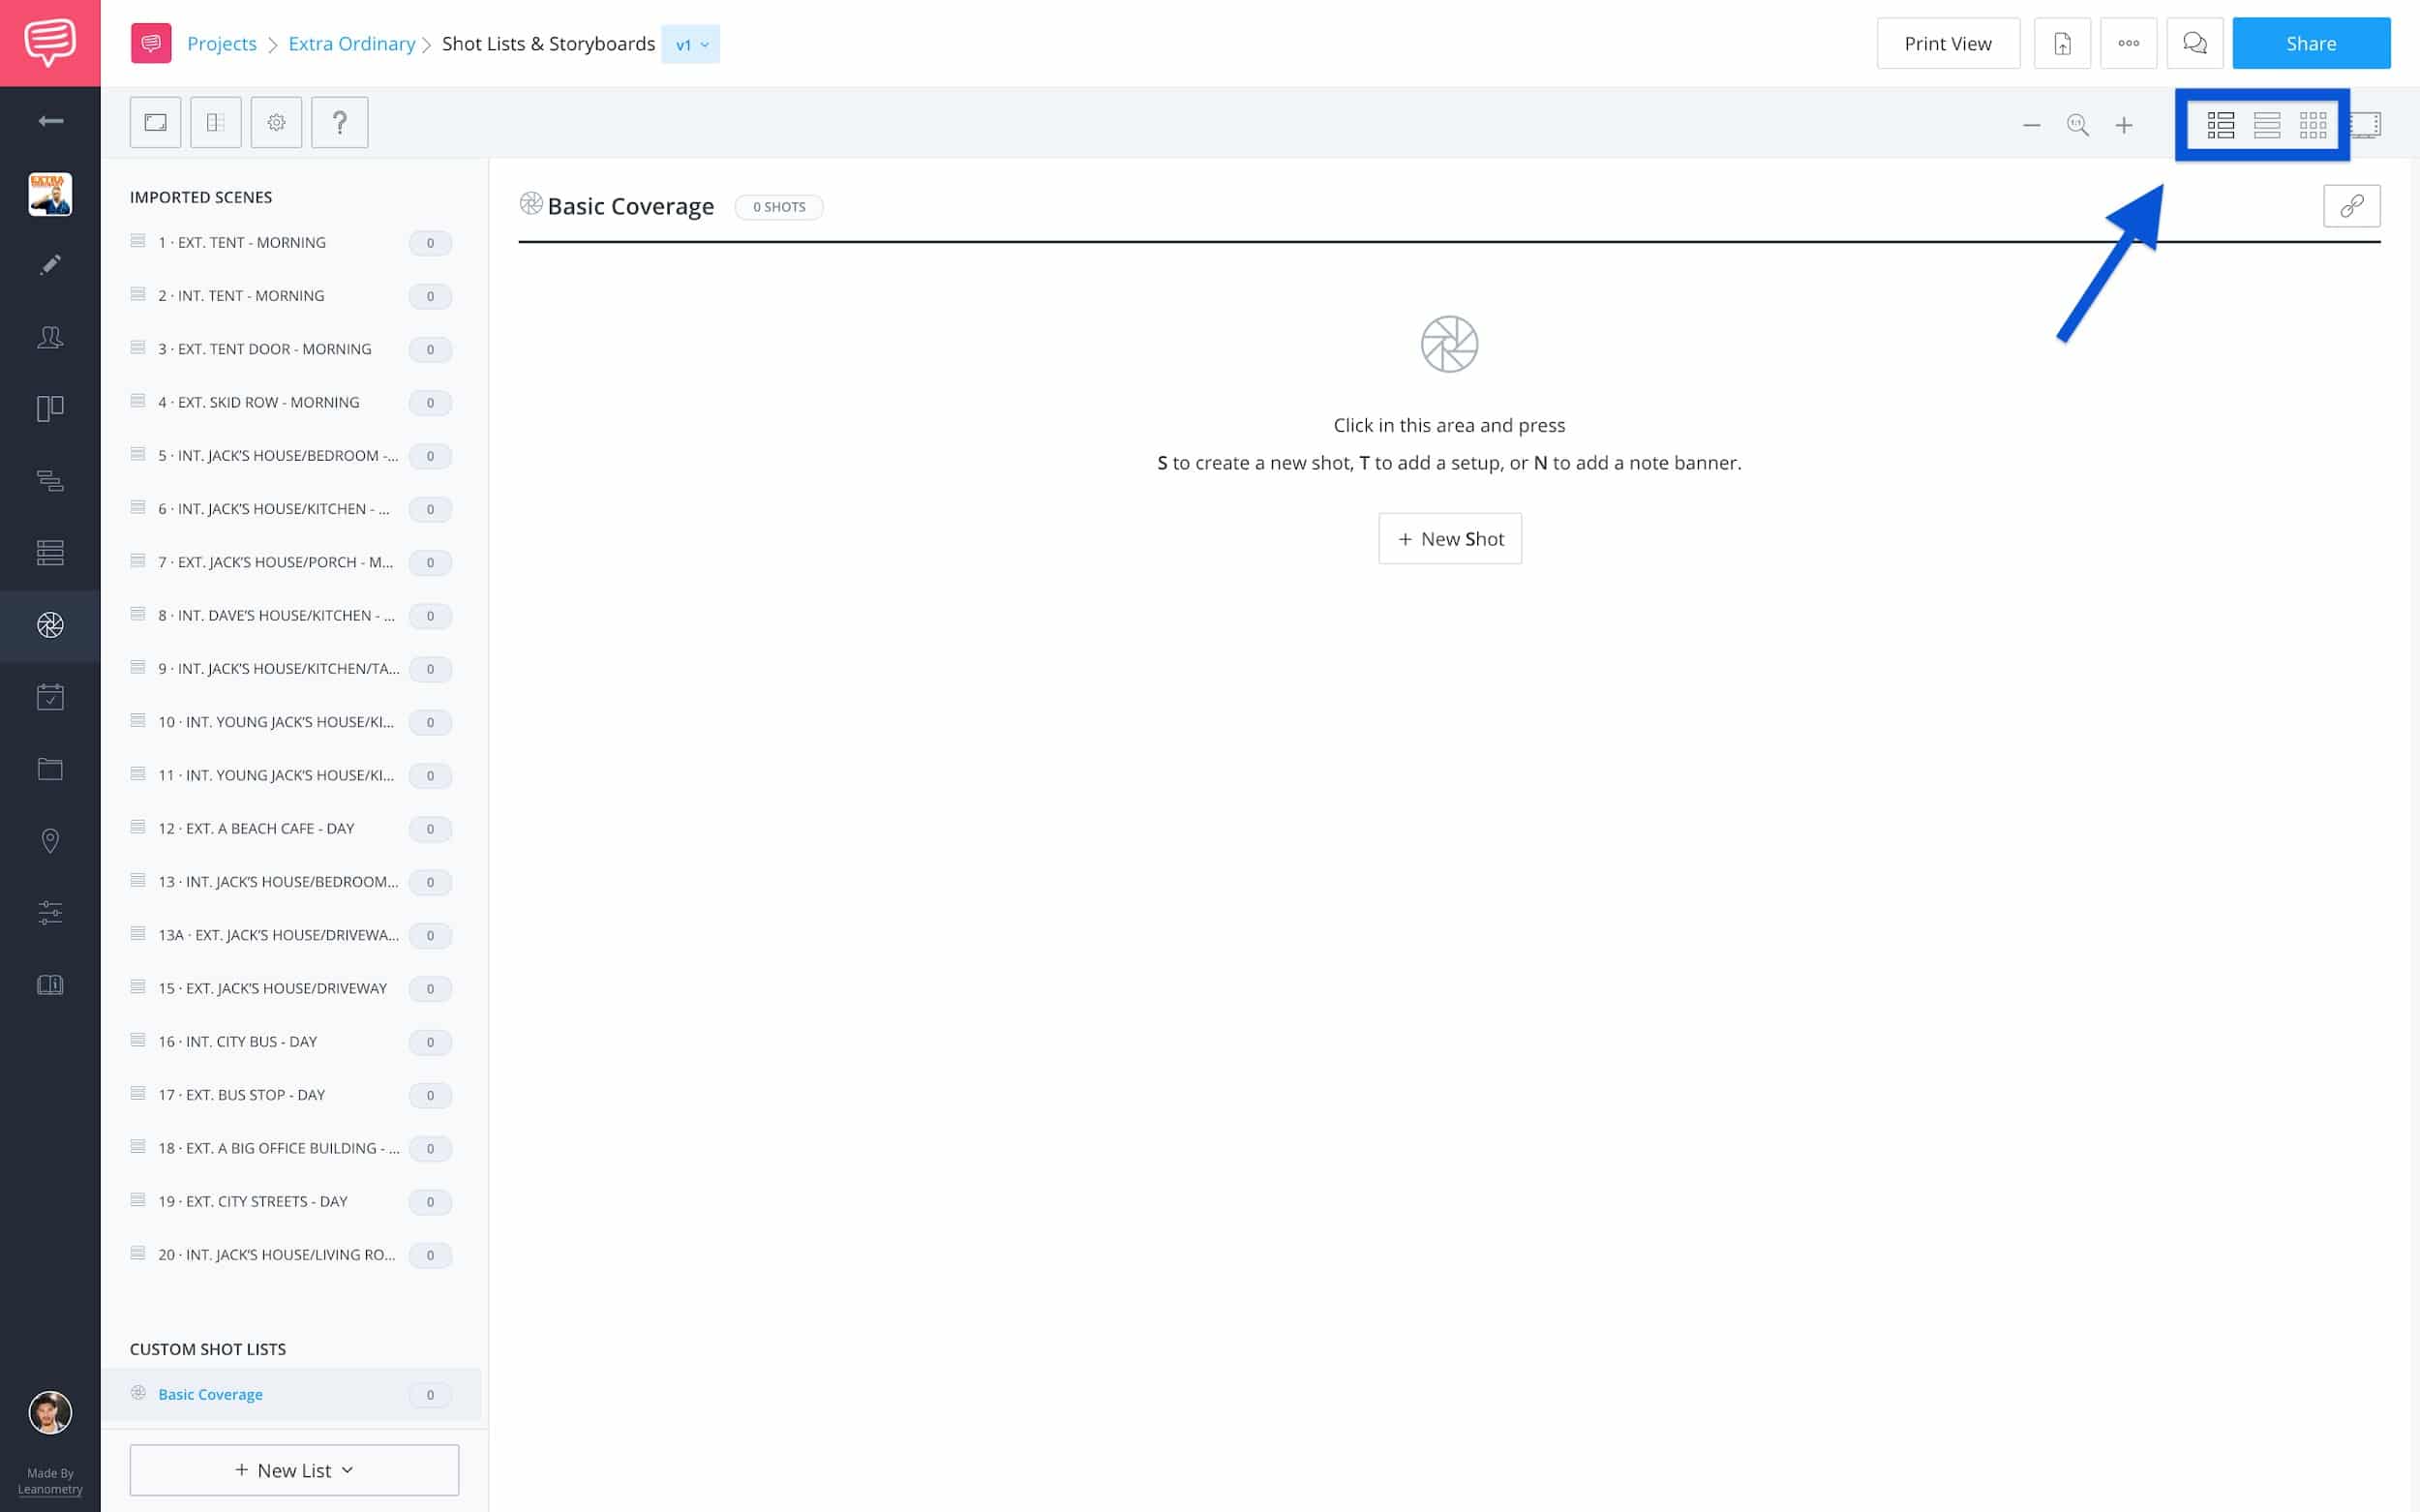
Now that you’ve selected your columns, decide on your page layout: Shot List, Storyboard, or Image Shot List.
Shot List & Storyboard • Layout
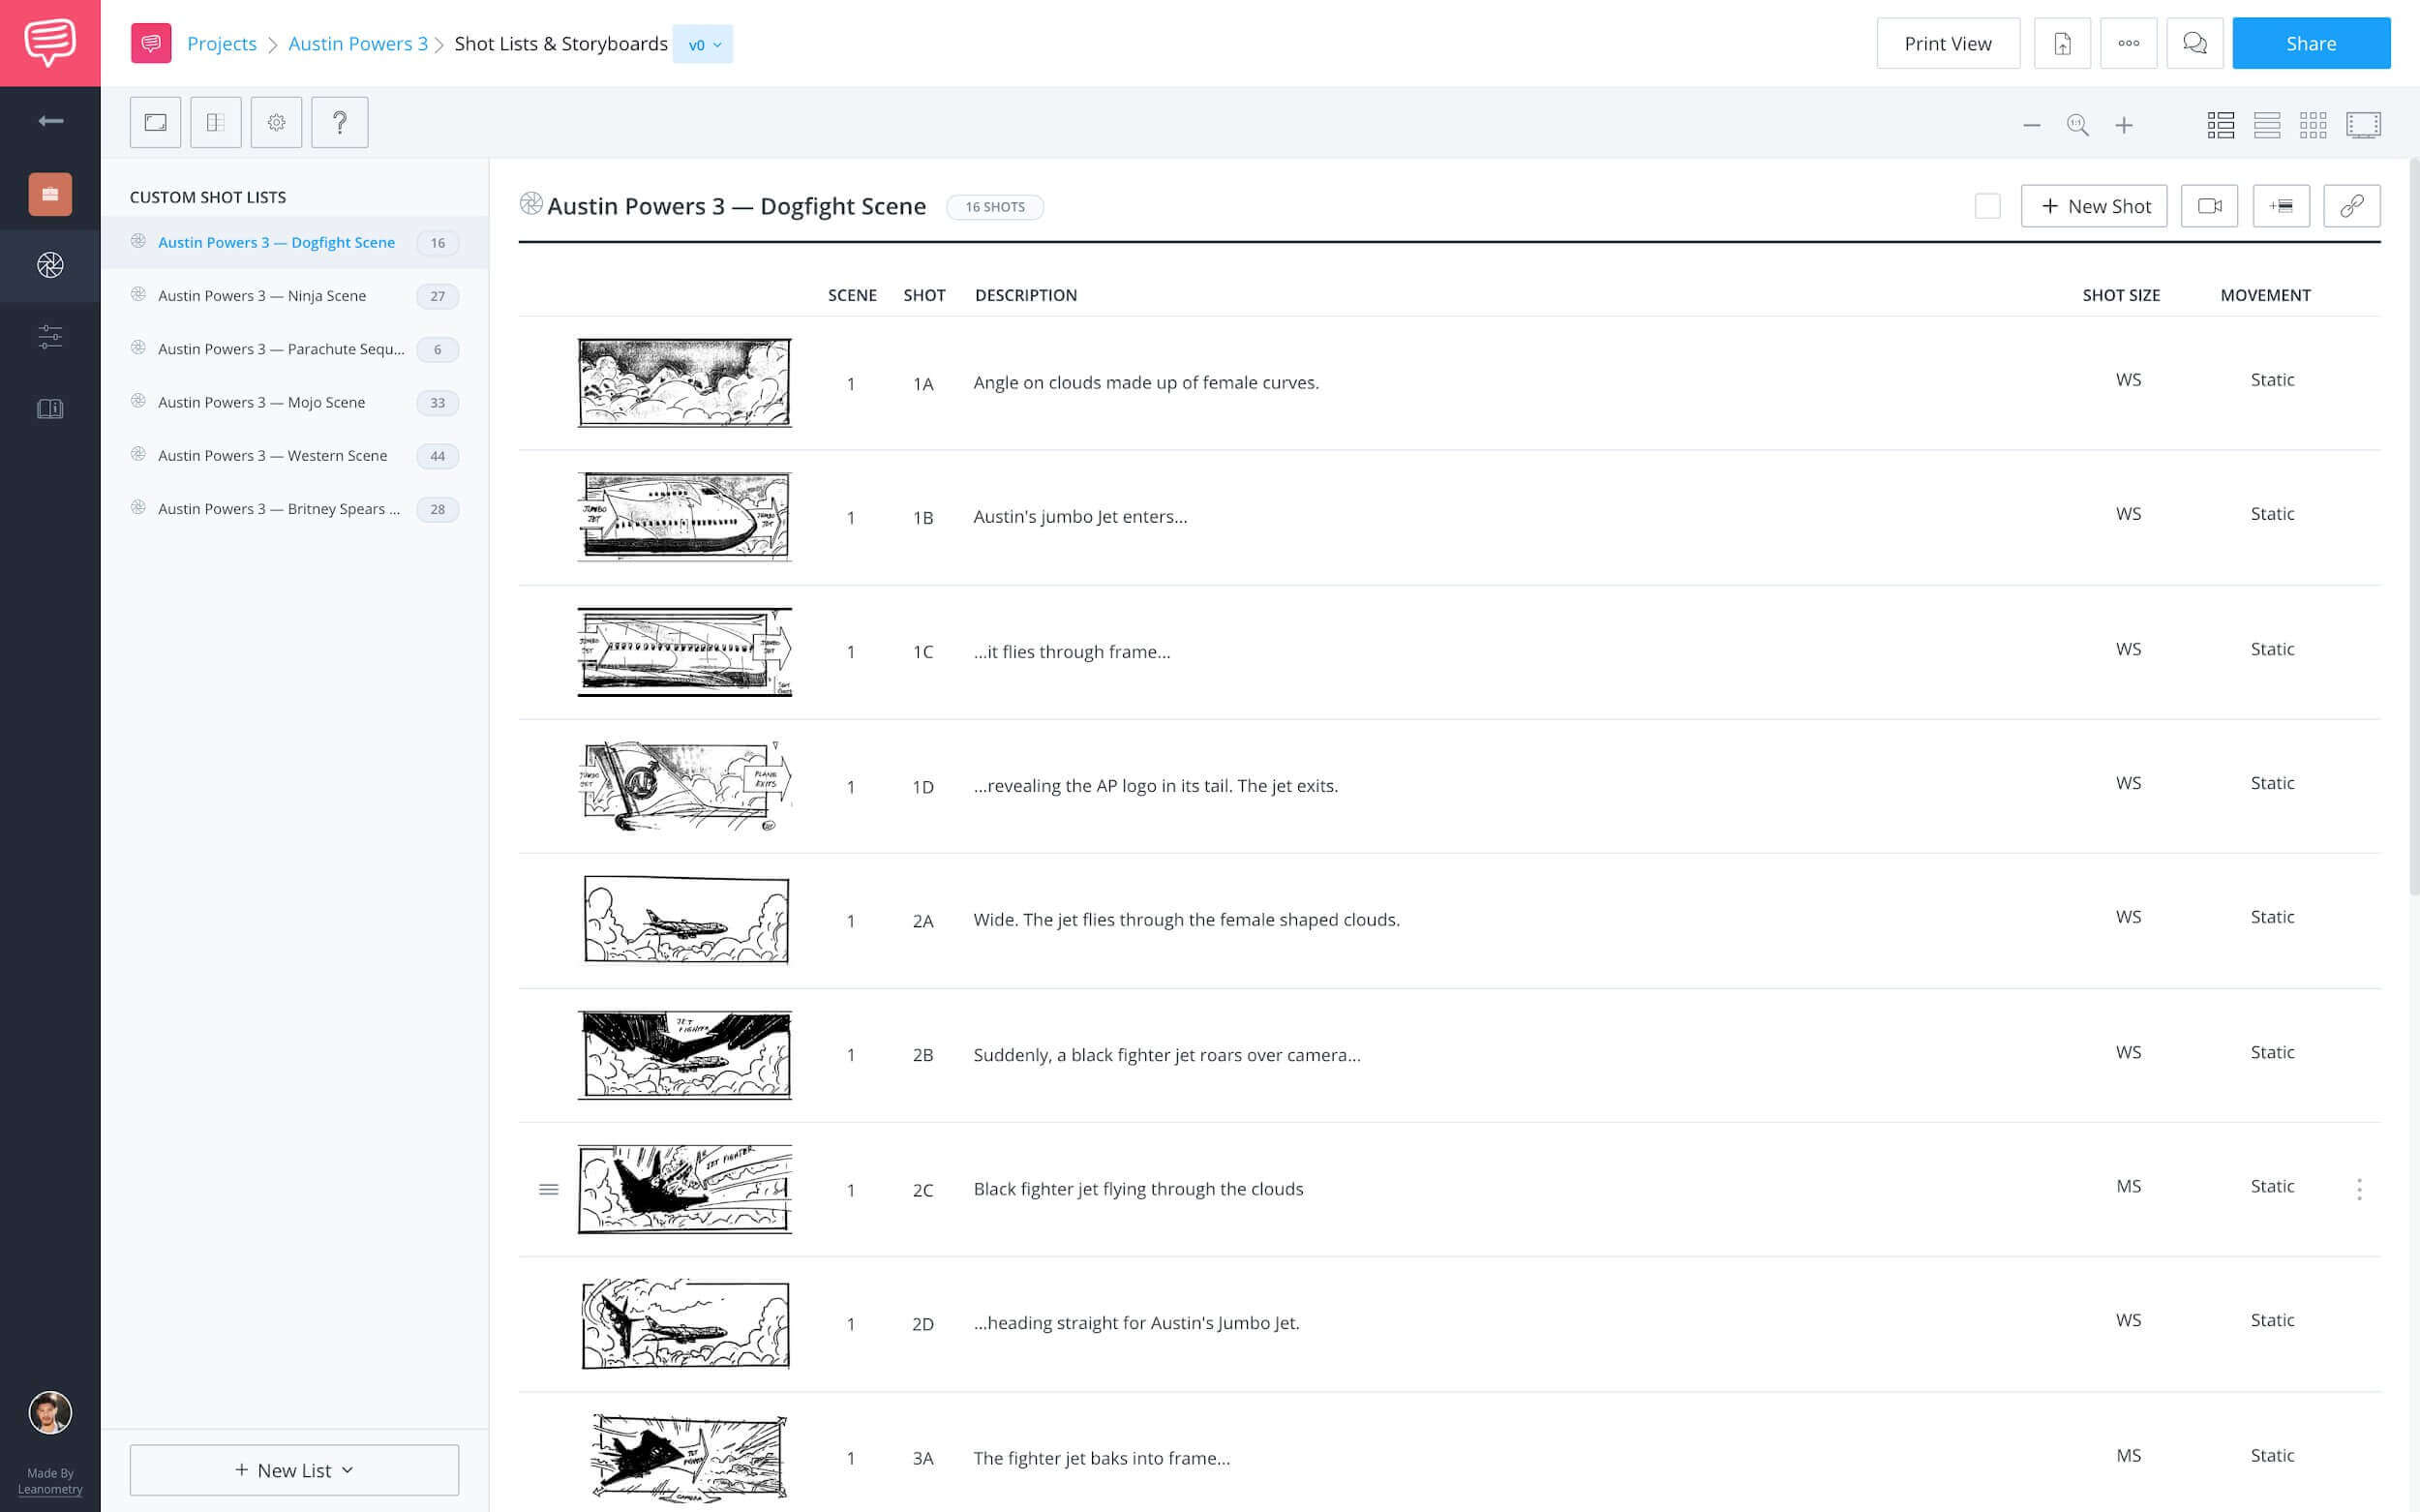
Each one of these layouts has its own advantages. For example, if you’re only interested in the shot information and not images you’d go with the Shot List View. To show you what that looks like, here's a fully populated shot list with original storyboards from Austin Powers in Goldmember.
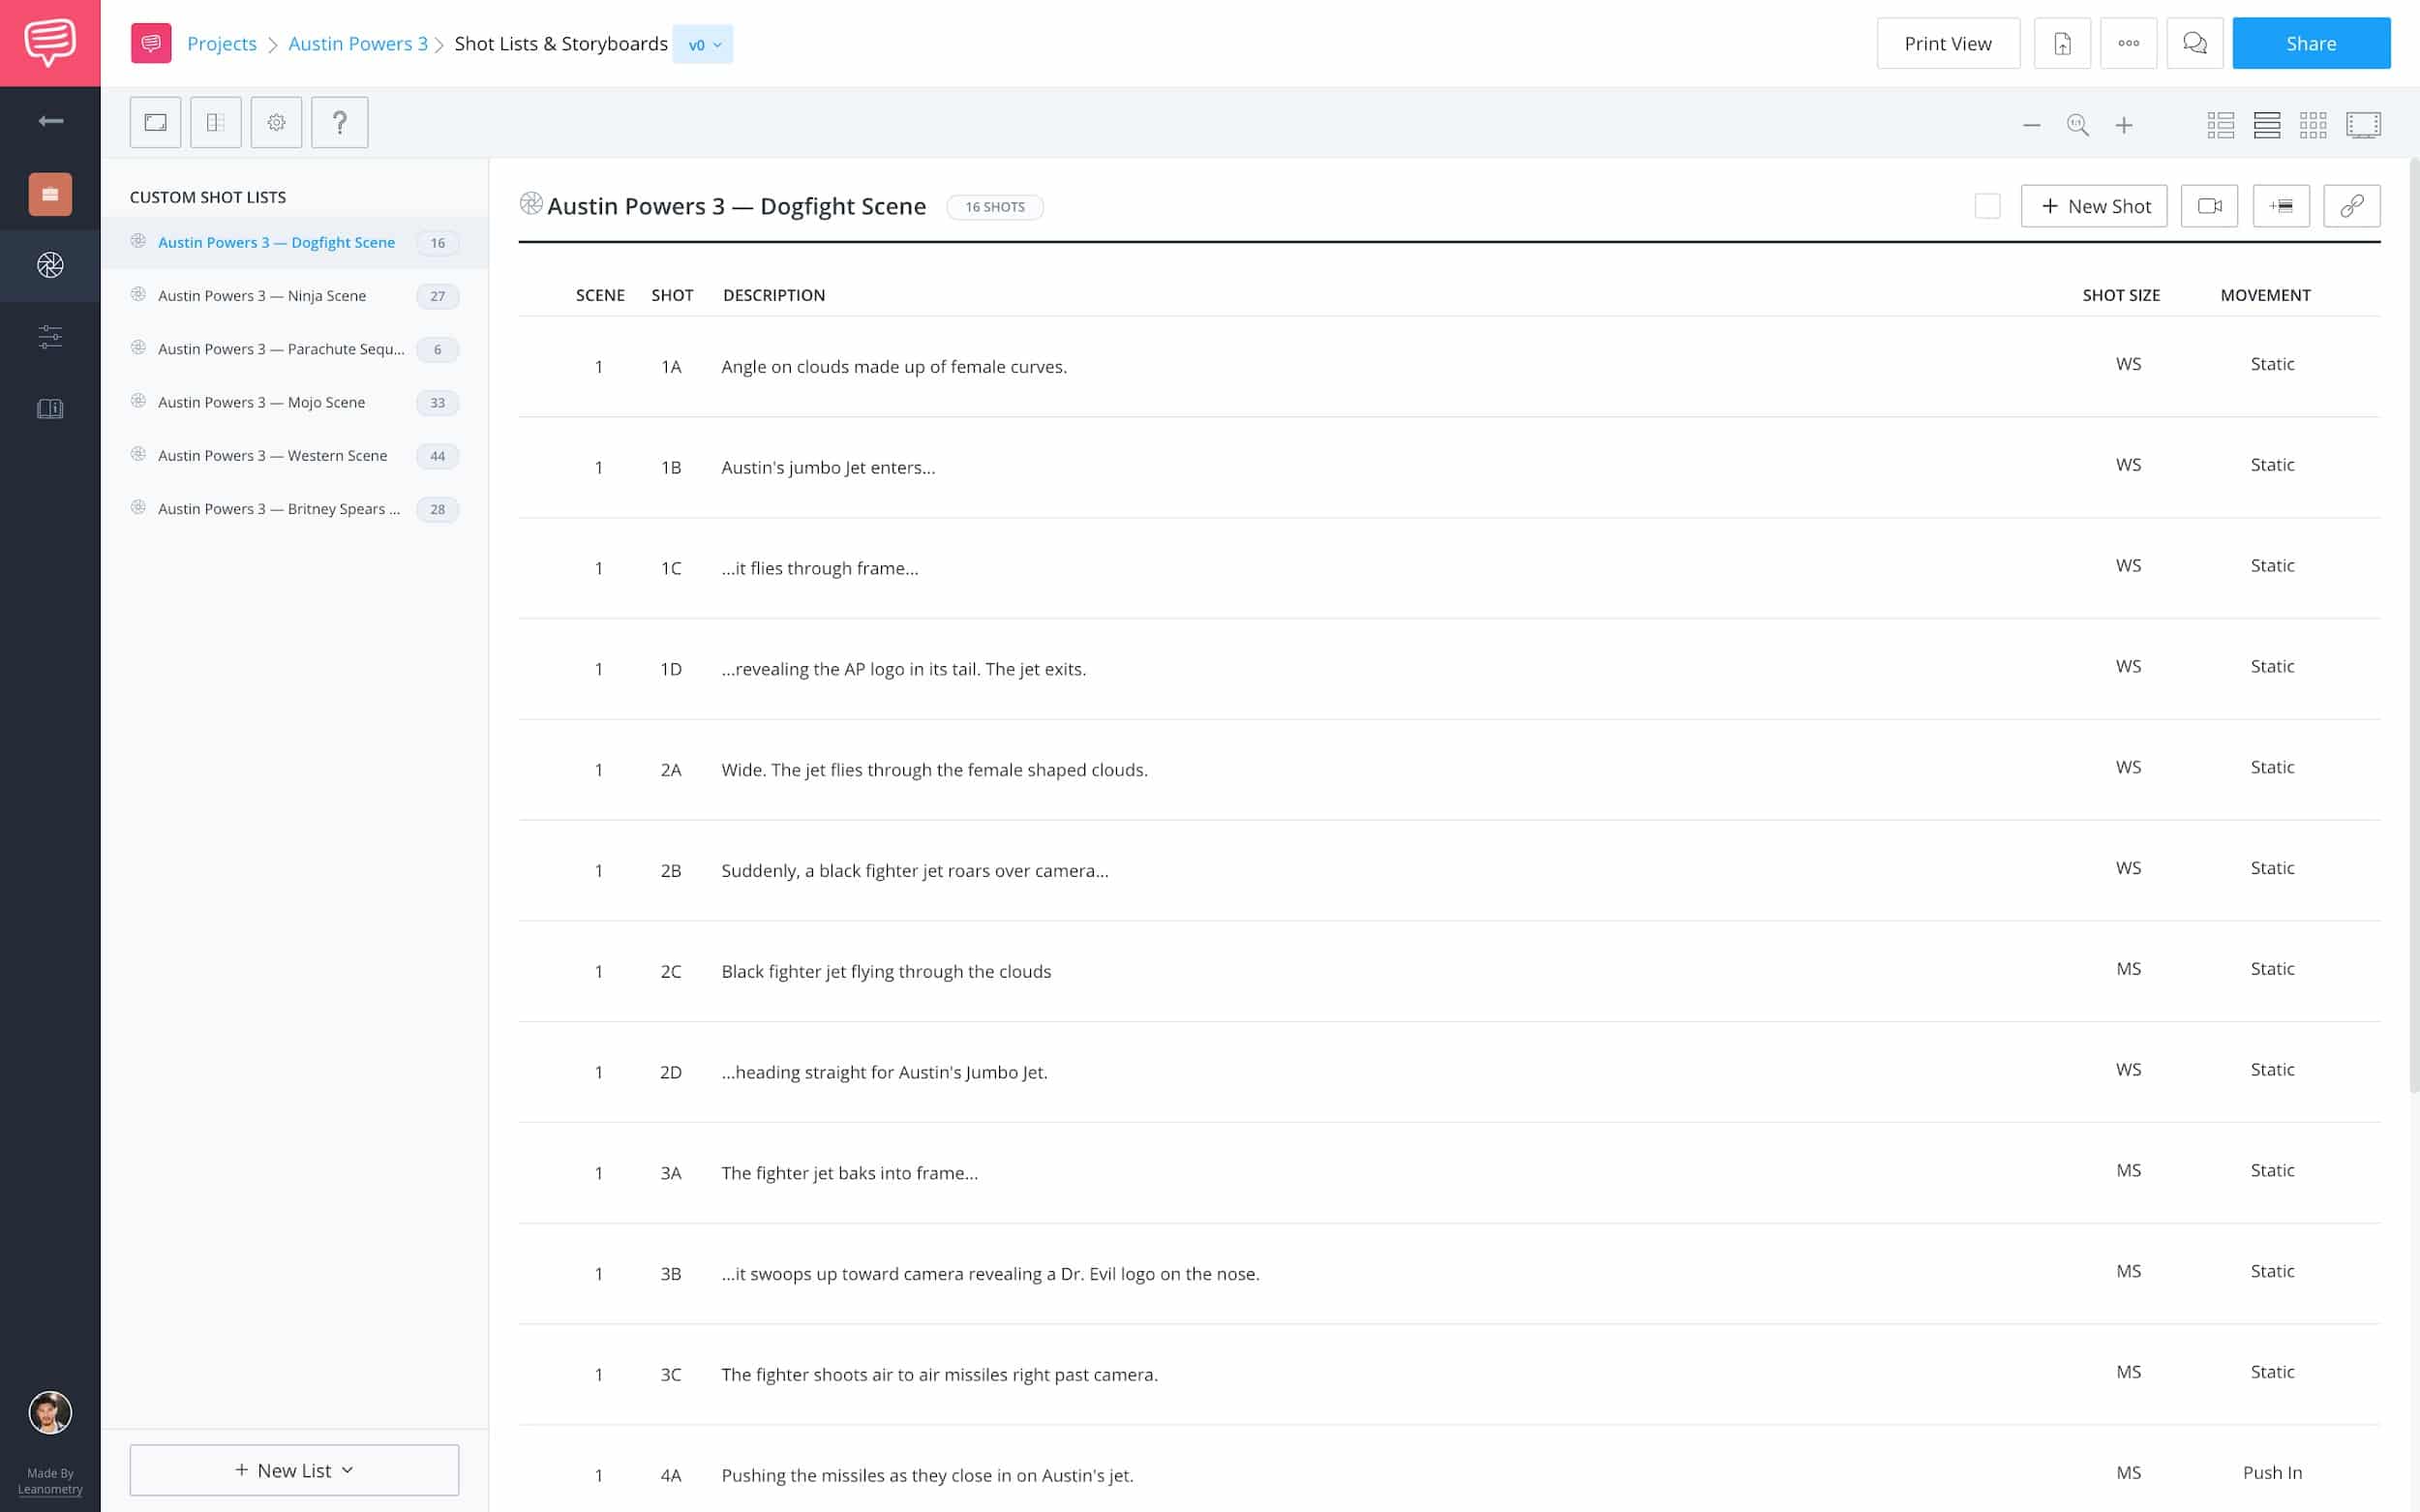
Shot List & Storyboard • Shot List View
If you want the focus to be on the reference images you’d most likely want to go with the Storyboard View. Again, we turn to the Austin Powers storyboards for reference.
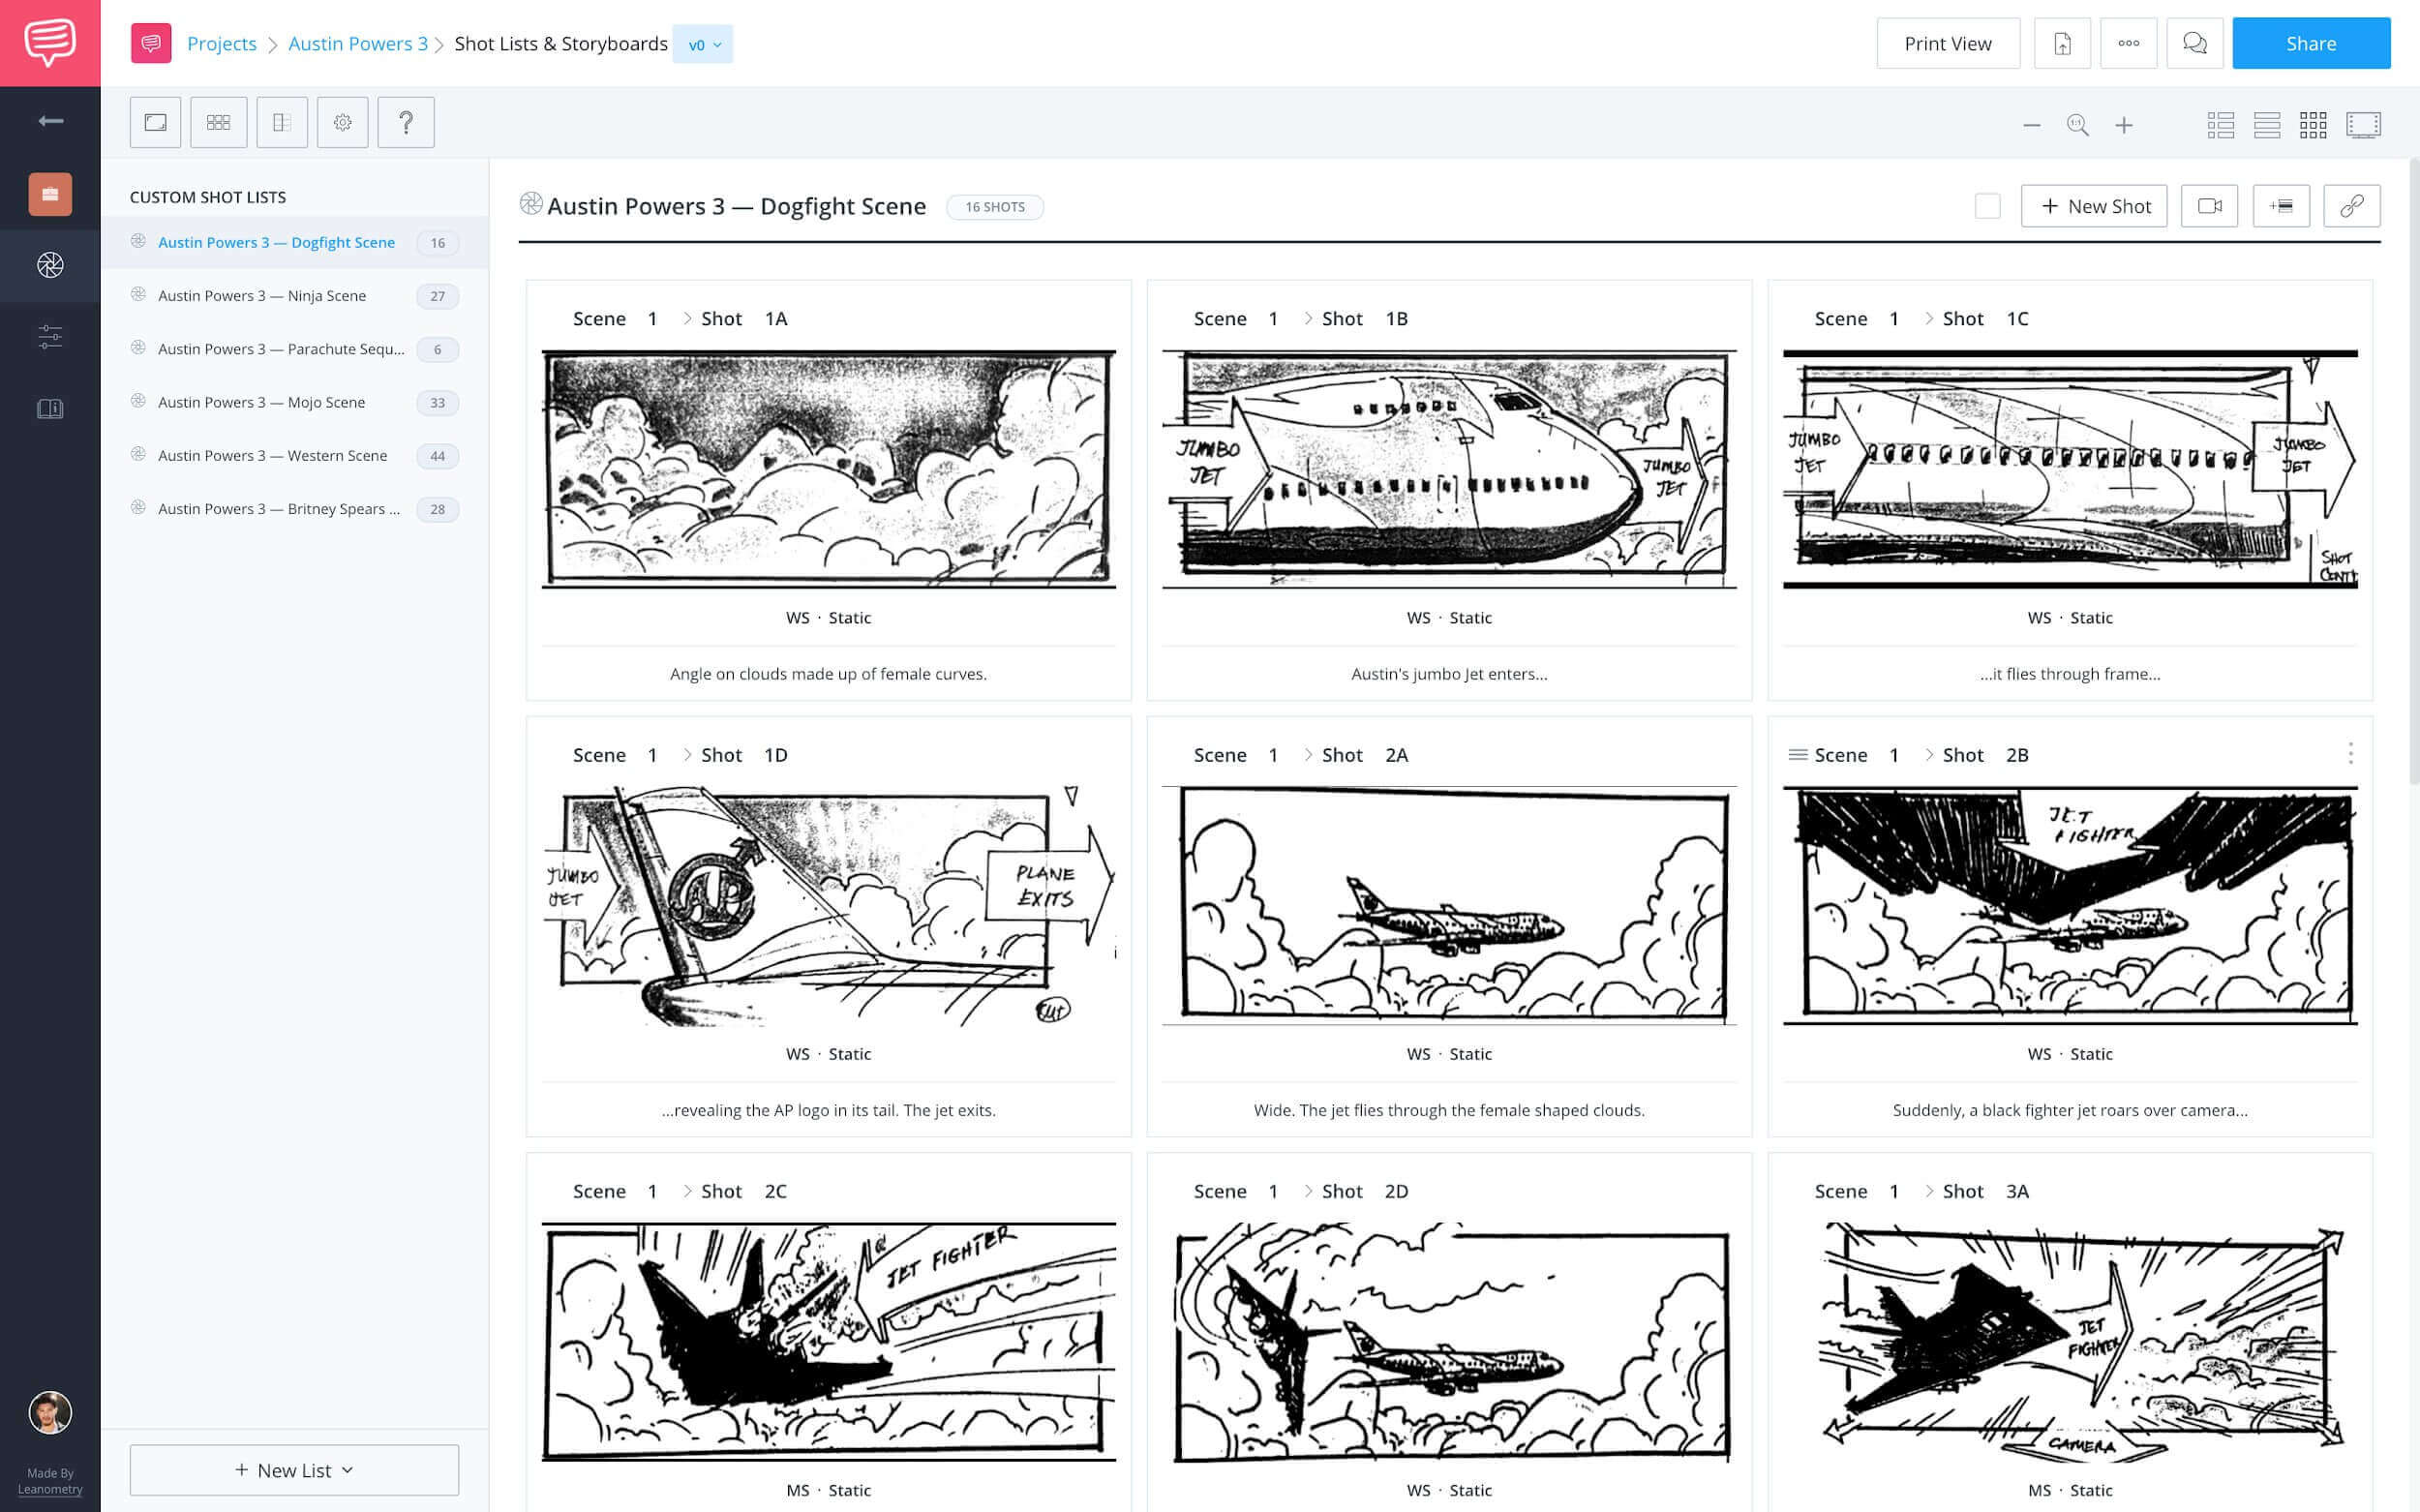
Shot List & Storyboard • Storyboard View
Or you can go with my preferred view, at least when I’m doing the initial shot list, the Image Shot List View. This gives you the best of both worlds. Follow the image link to toggle between all three of these views and our collection of Austin Powers storyboards. We also have a video breakdown on how they shot this sequence with director Jay Roach.
Shot List & Storyboard • Image Shot List View
We’ve set the stage. Now it’s time to add our shots to the template.
Common Shots
Step 3: Add your coverage shots
For this example, I’m creating a template for basic film coverage of a two-person scene.
The most common film coverage for a 2-person scene would be:
- Master Shot: A master or establishing shot contains all of the action of the scene. You’ll want to find an angle that will capture all of this. Learn more about establishing shots →
- Medium Shots: or waist shot is captured at a medium distance from the subject. It is used for dialogue scenes, but also depict body language and more of the setting. Oftentimes it will frame multiple subjects as well as a portion of the background and space in general. Learn more about medium shots →
- Close Ups: The close-up shot is where all the subtlety and nuance of the actors performance will be captured. Learn more about close-up shots →
- OTS Shots: A shot where a portion of an actor’s shoulder and head occupy the foreground, and help frame the other actor.
Learn more about over-the-shoulder shots →
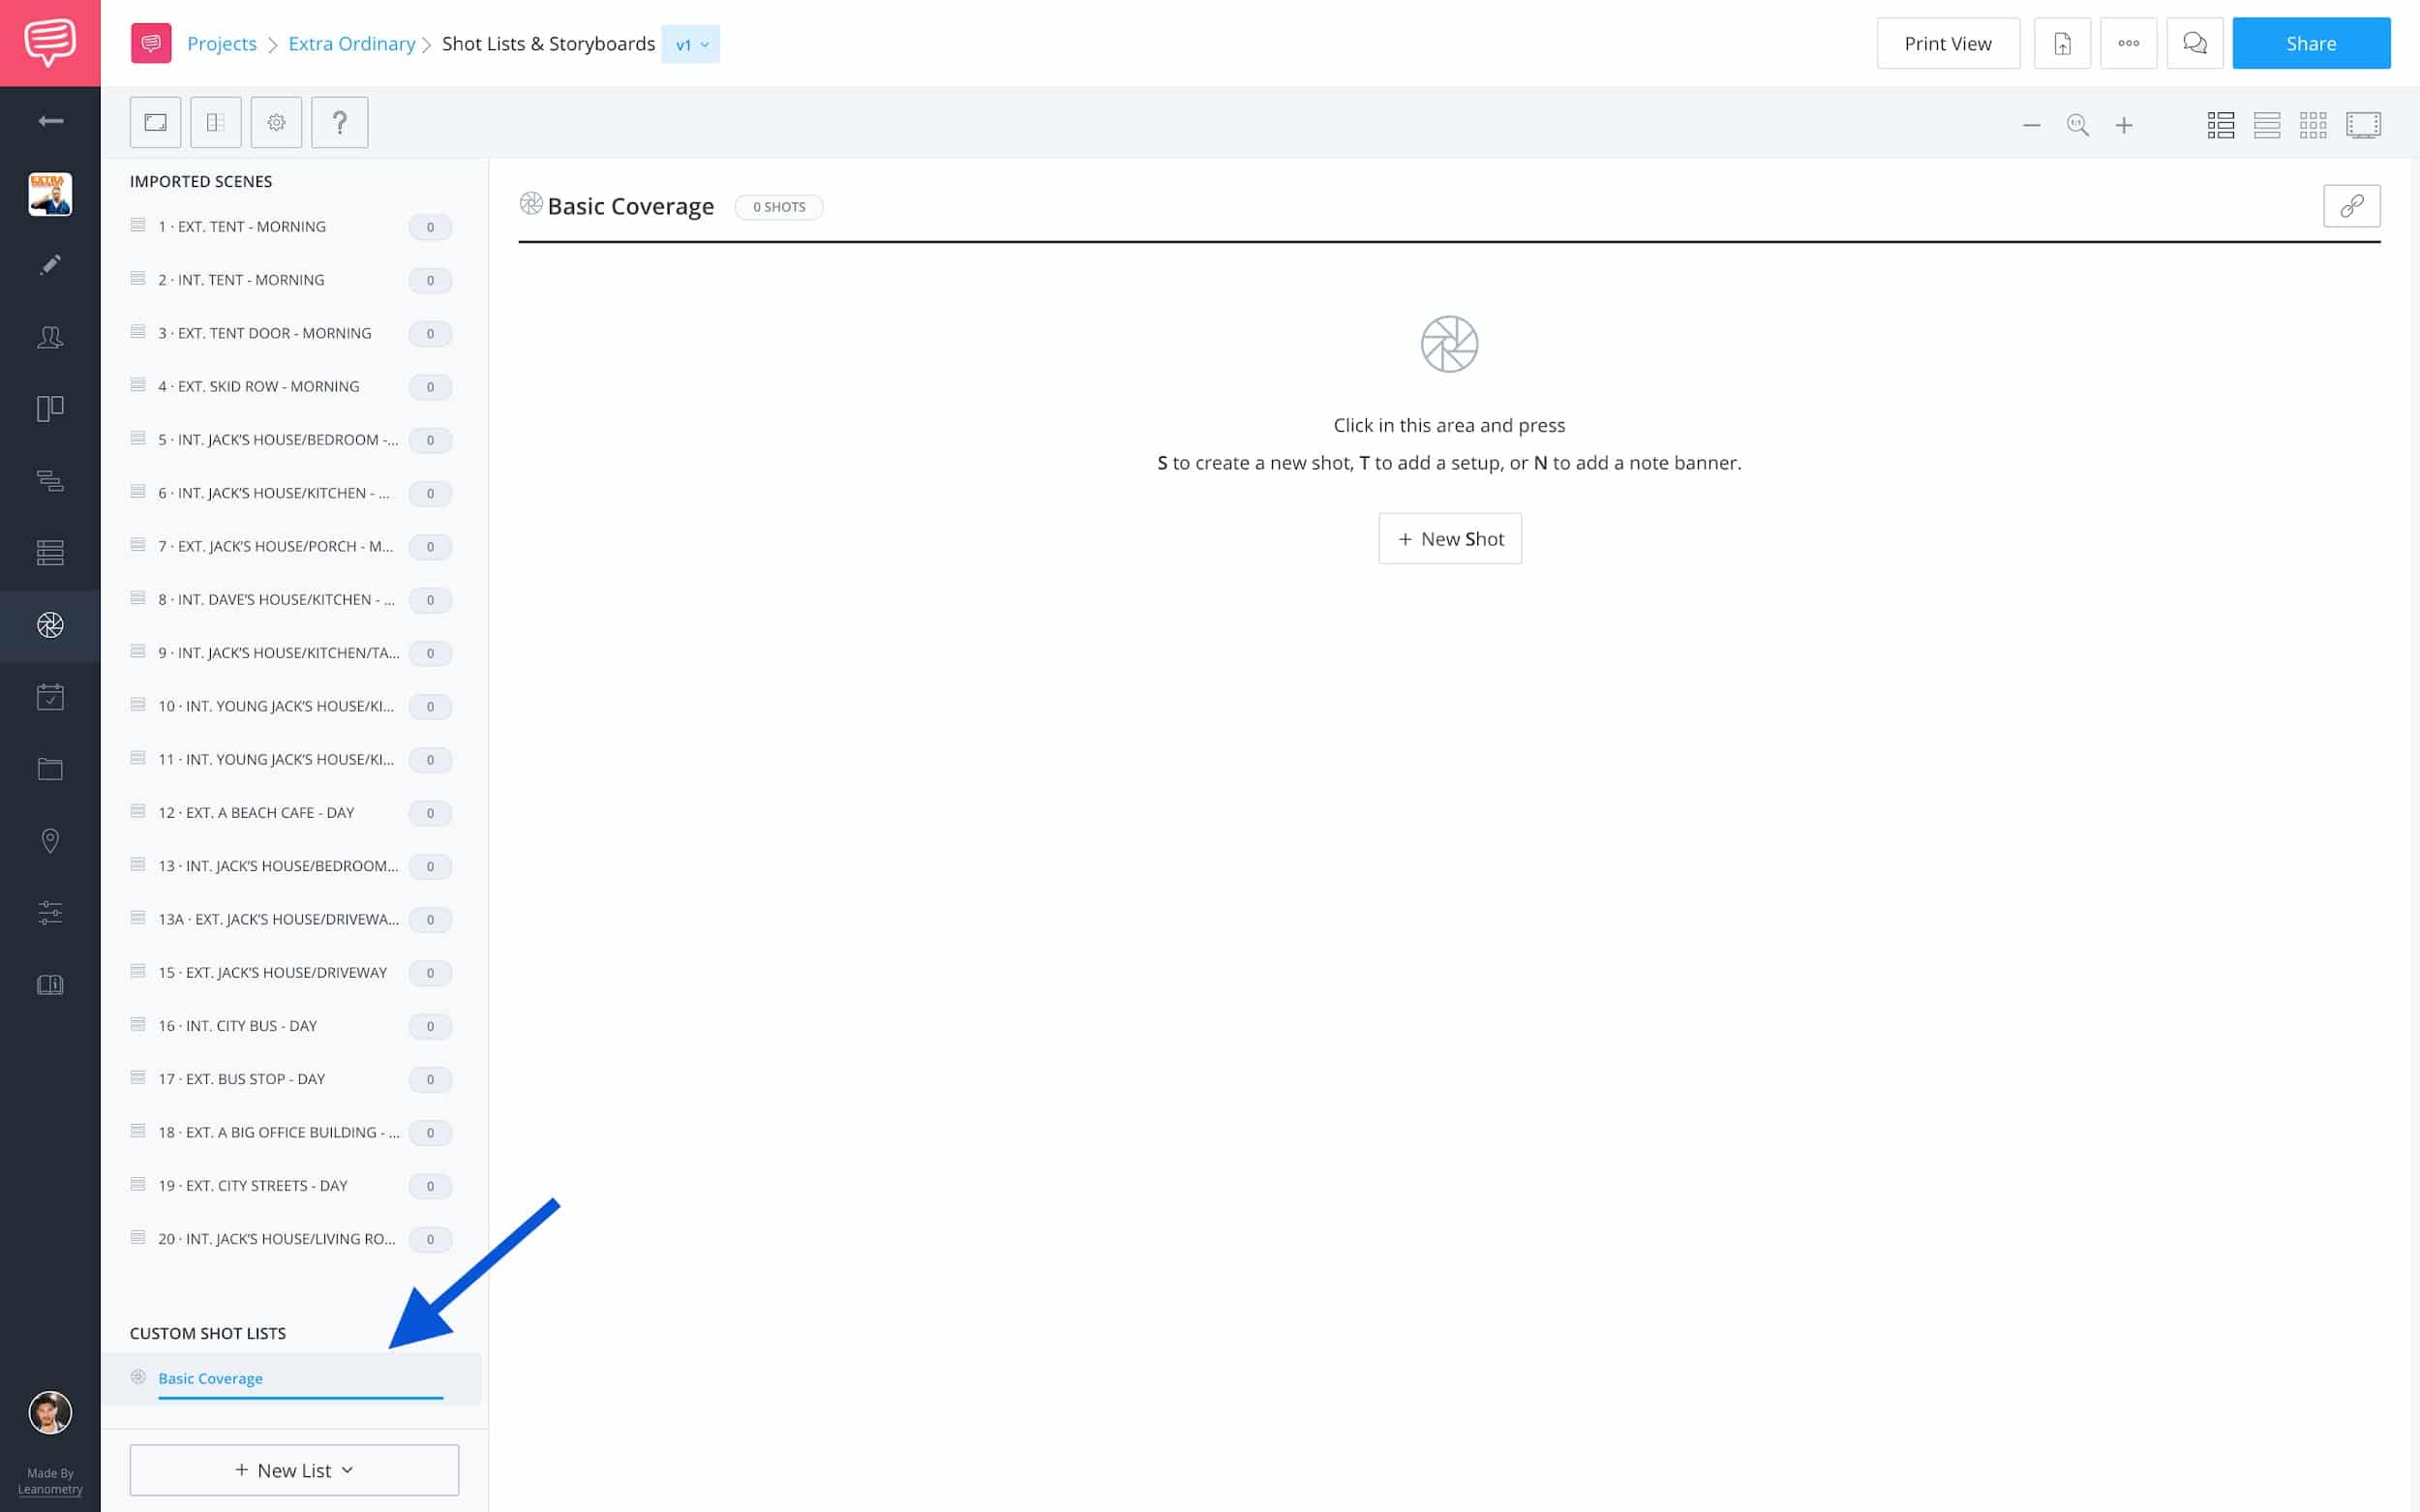
First, I’ll click on the custom “Basic Coverage” list:
Select Template List
Now that I have the list selected, I’ll click on “+ New Shot.” In the pop up, add a description (if applicable), the shot specs and then click “Save & Add Another” until you’ve added all of the necessary shots at which point you would click “Save & Close.”
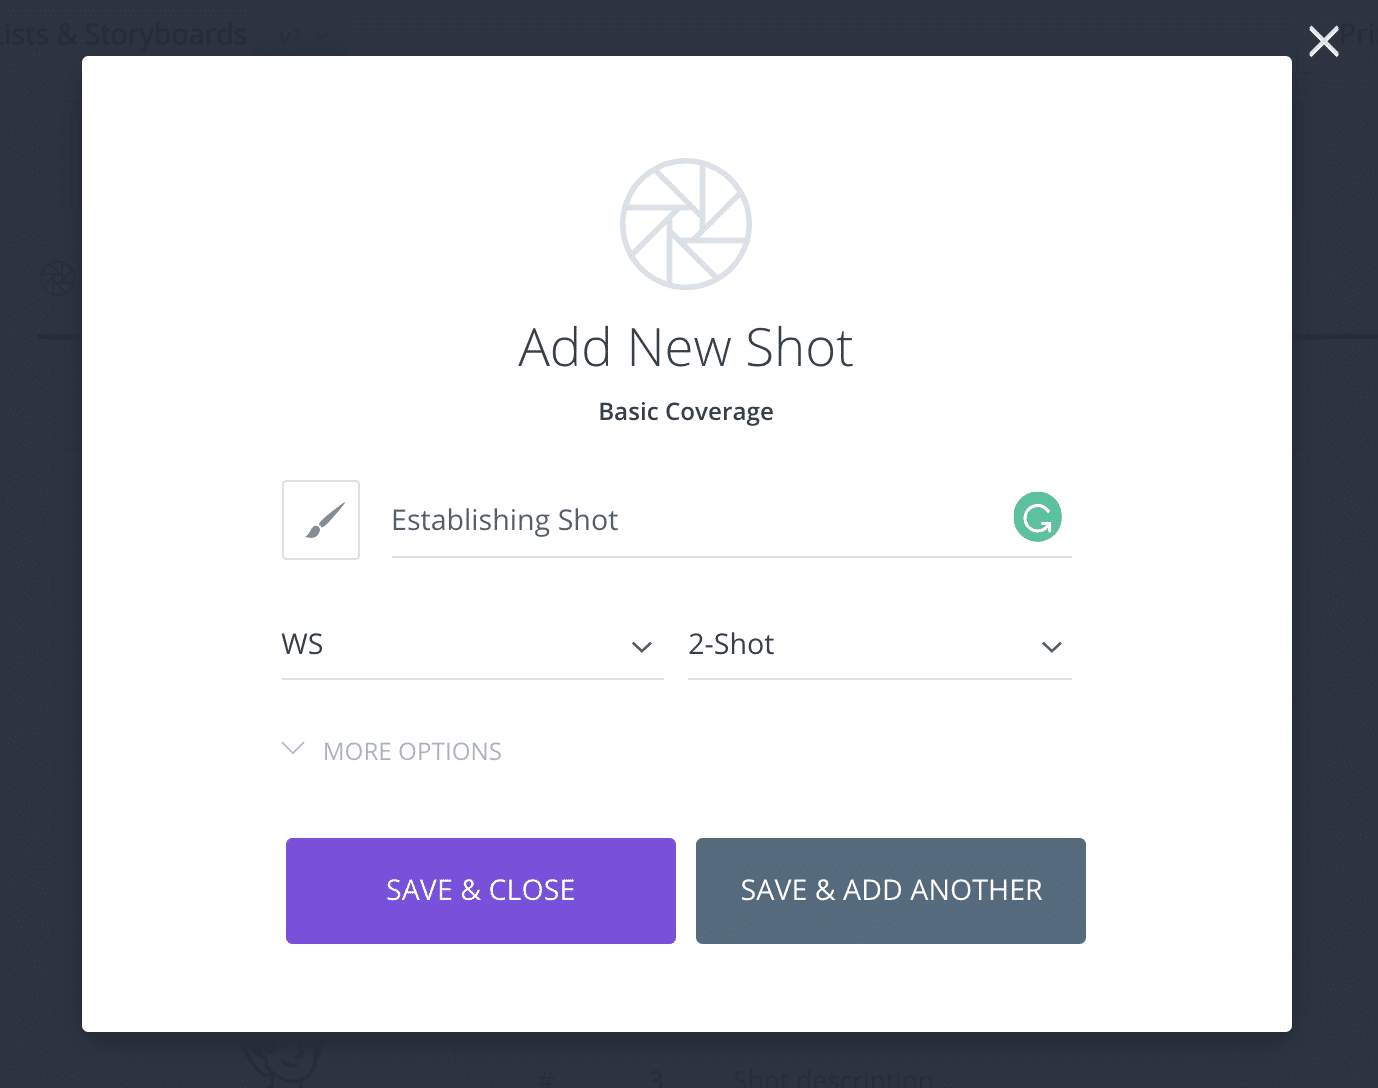
+New Shot • Shot Specs
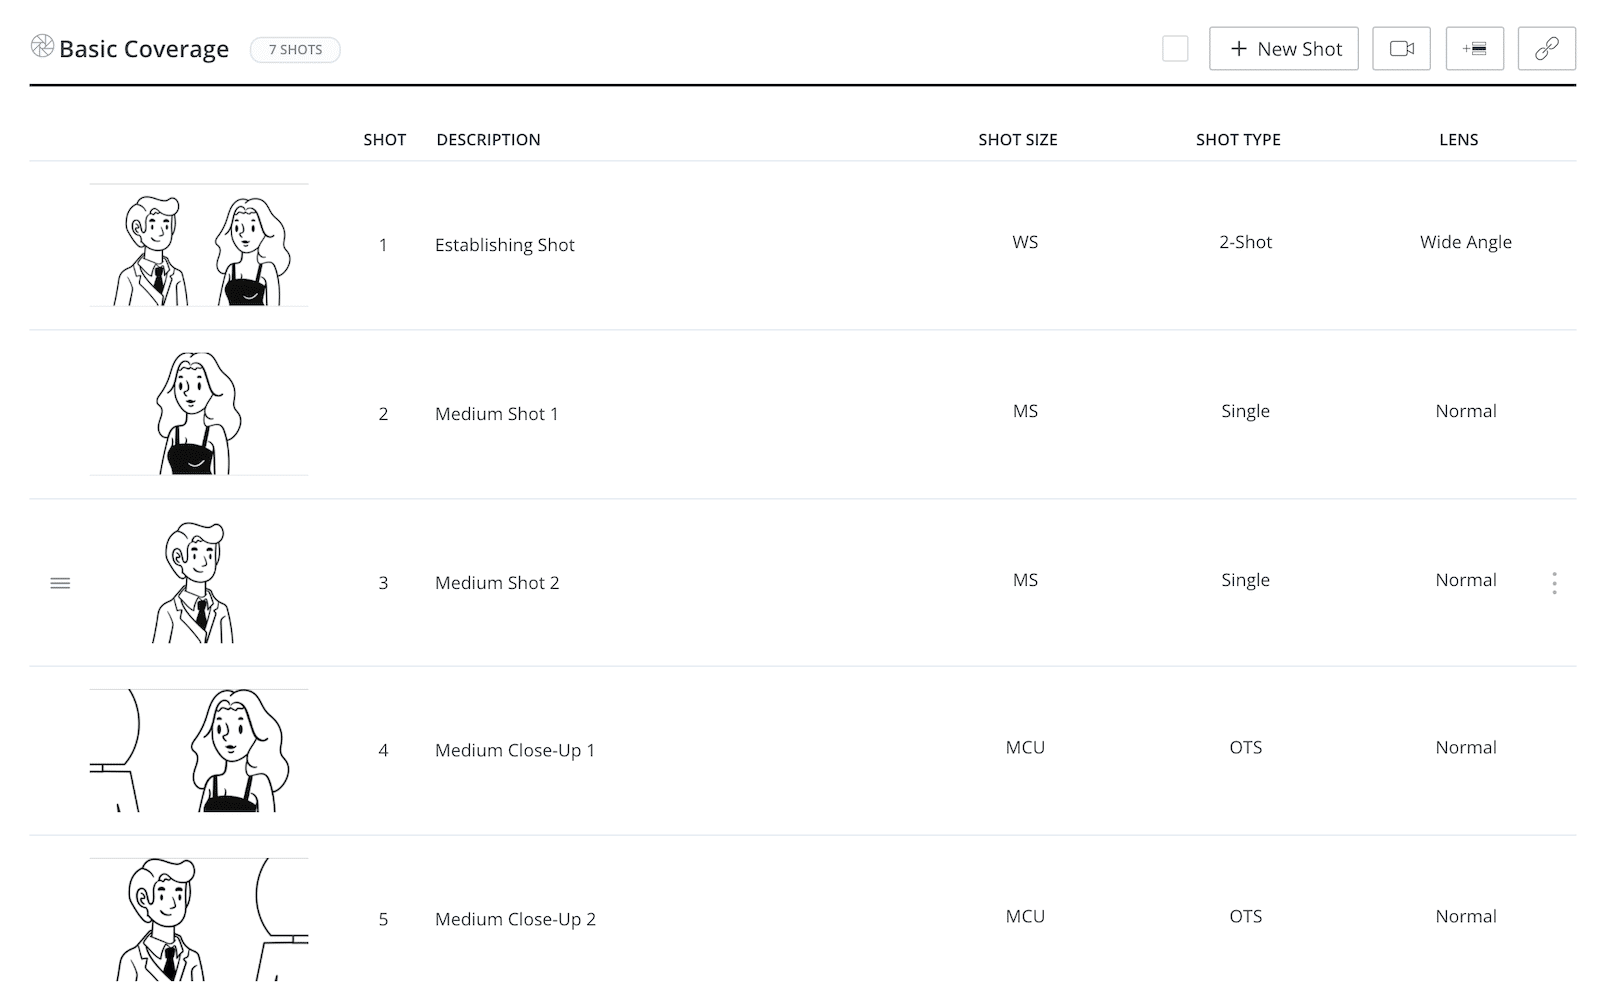
Now we have a “Basic Coverage” shot list template:
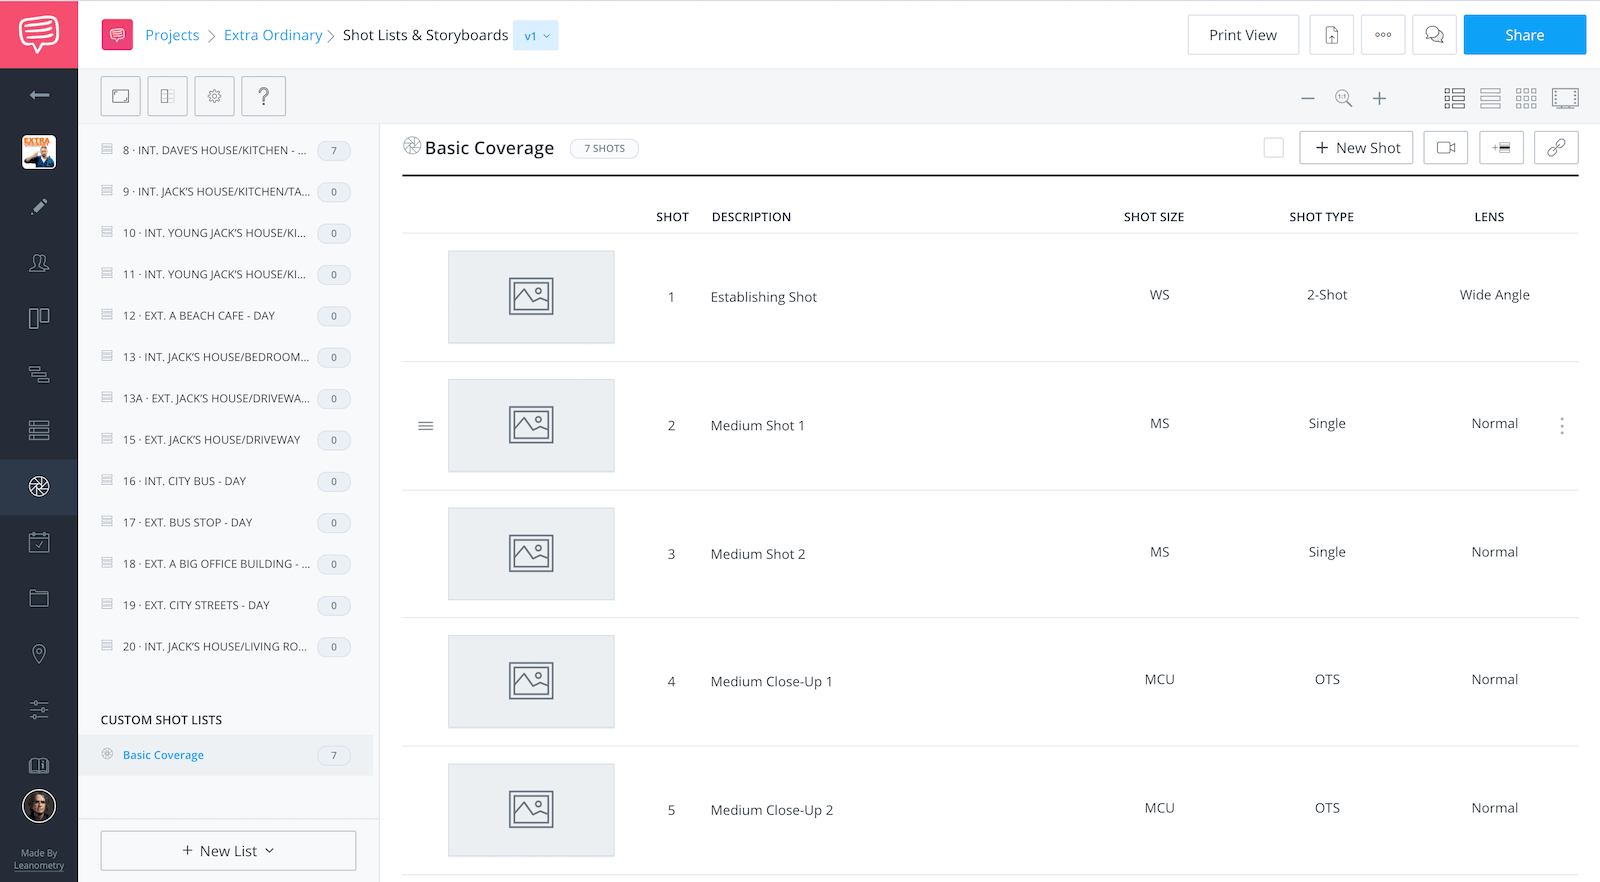
Shot List & Storyboards • Basic Coverage
We’ve created the shot list, added the shots, now we can add image references or storyboards for each shot.
Storyboards
Step 3: Add reference images
Adding a reference image to your shots will help not only you, but anyone who looks at the list, to quickly scan and visualize what is supposed to be happening in the scene.
If you’ve hired a storyboard artist, this is where you would import their art frames into StudioBinder. Otherwise, Google Images is a great resource for finding reference images for your shot list.
To add an image, click the image box to the left of the shot specs:
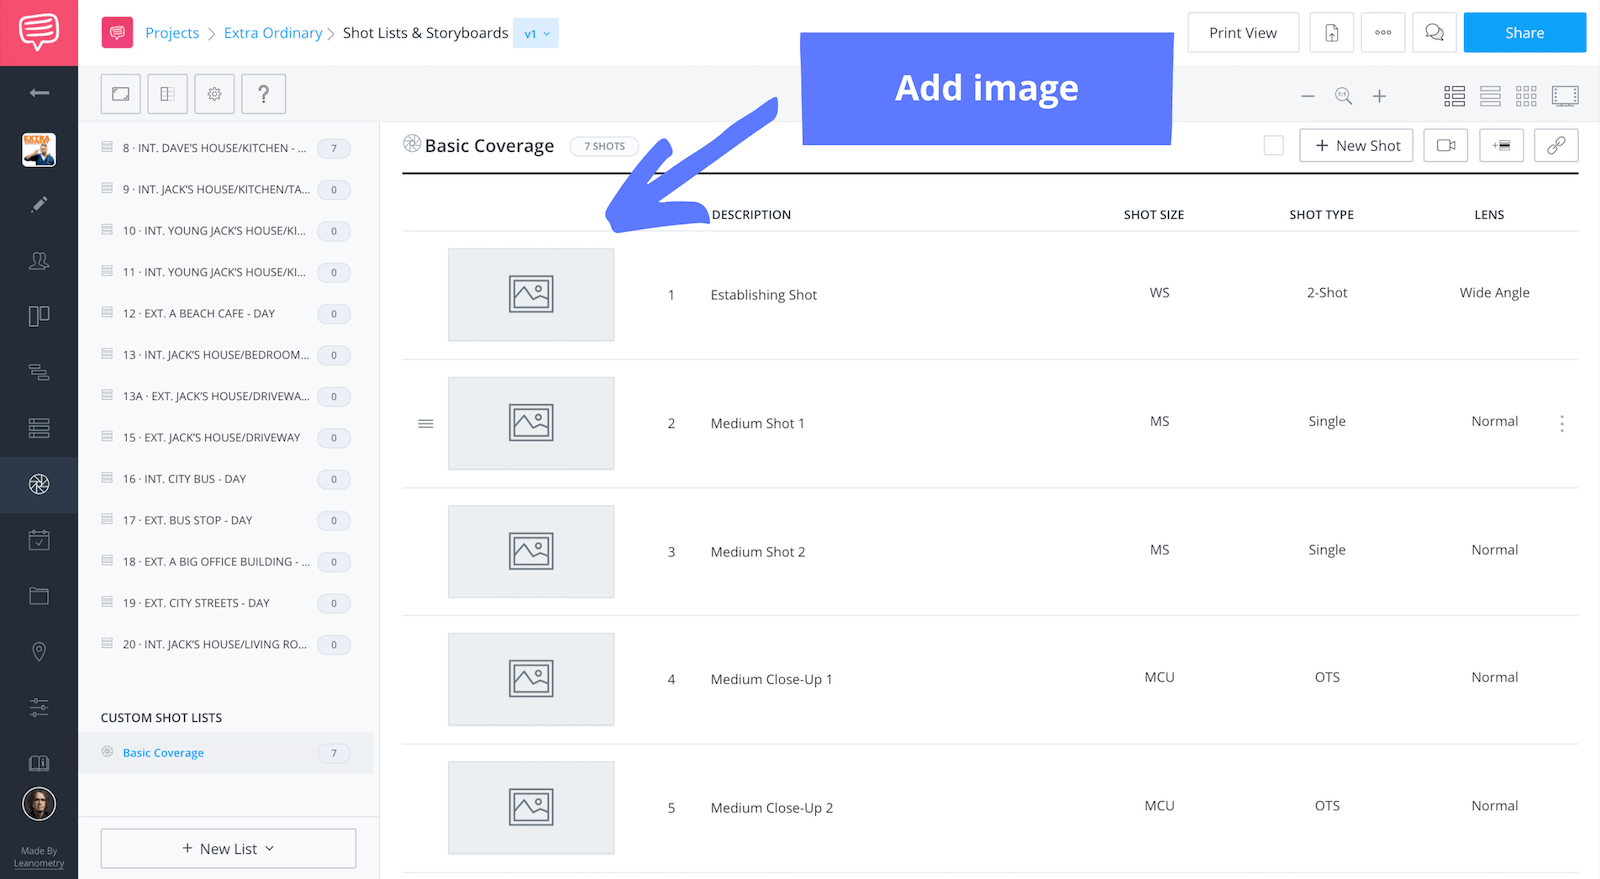
Shot List & Storyboard • Add Image
In the pop up, locate your image file, select it and click “Open”:
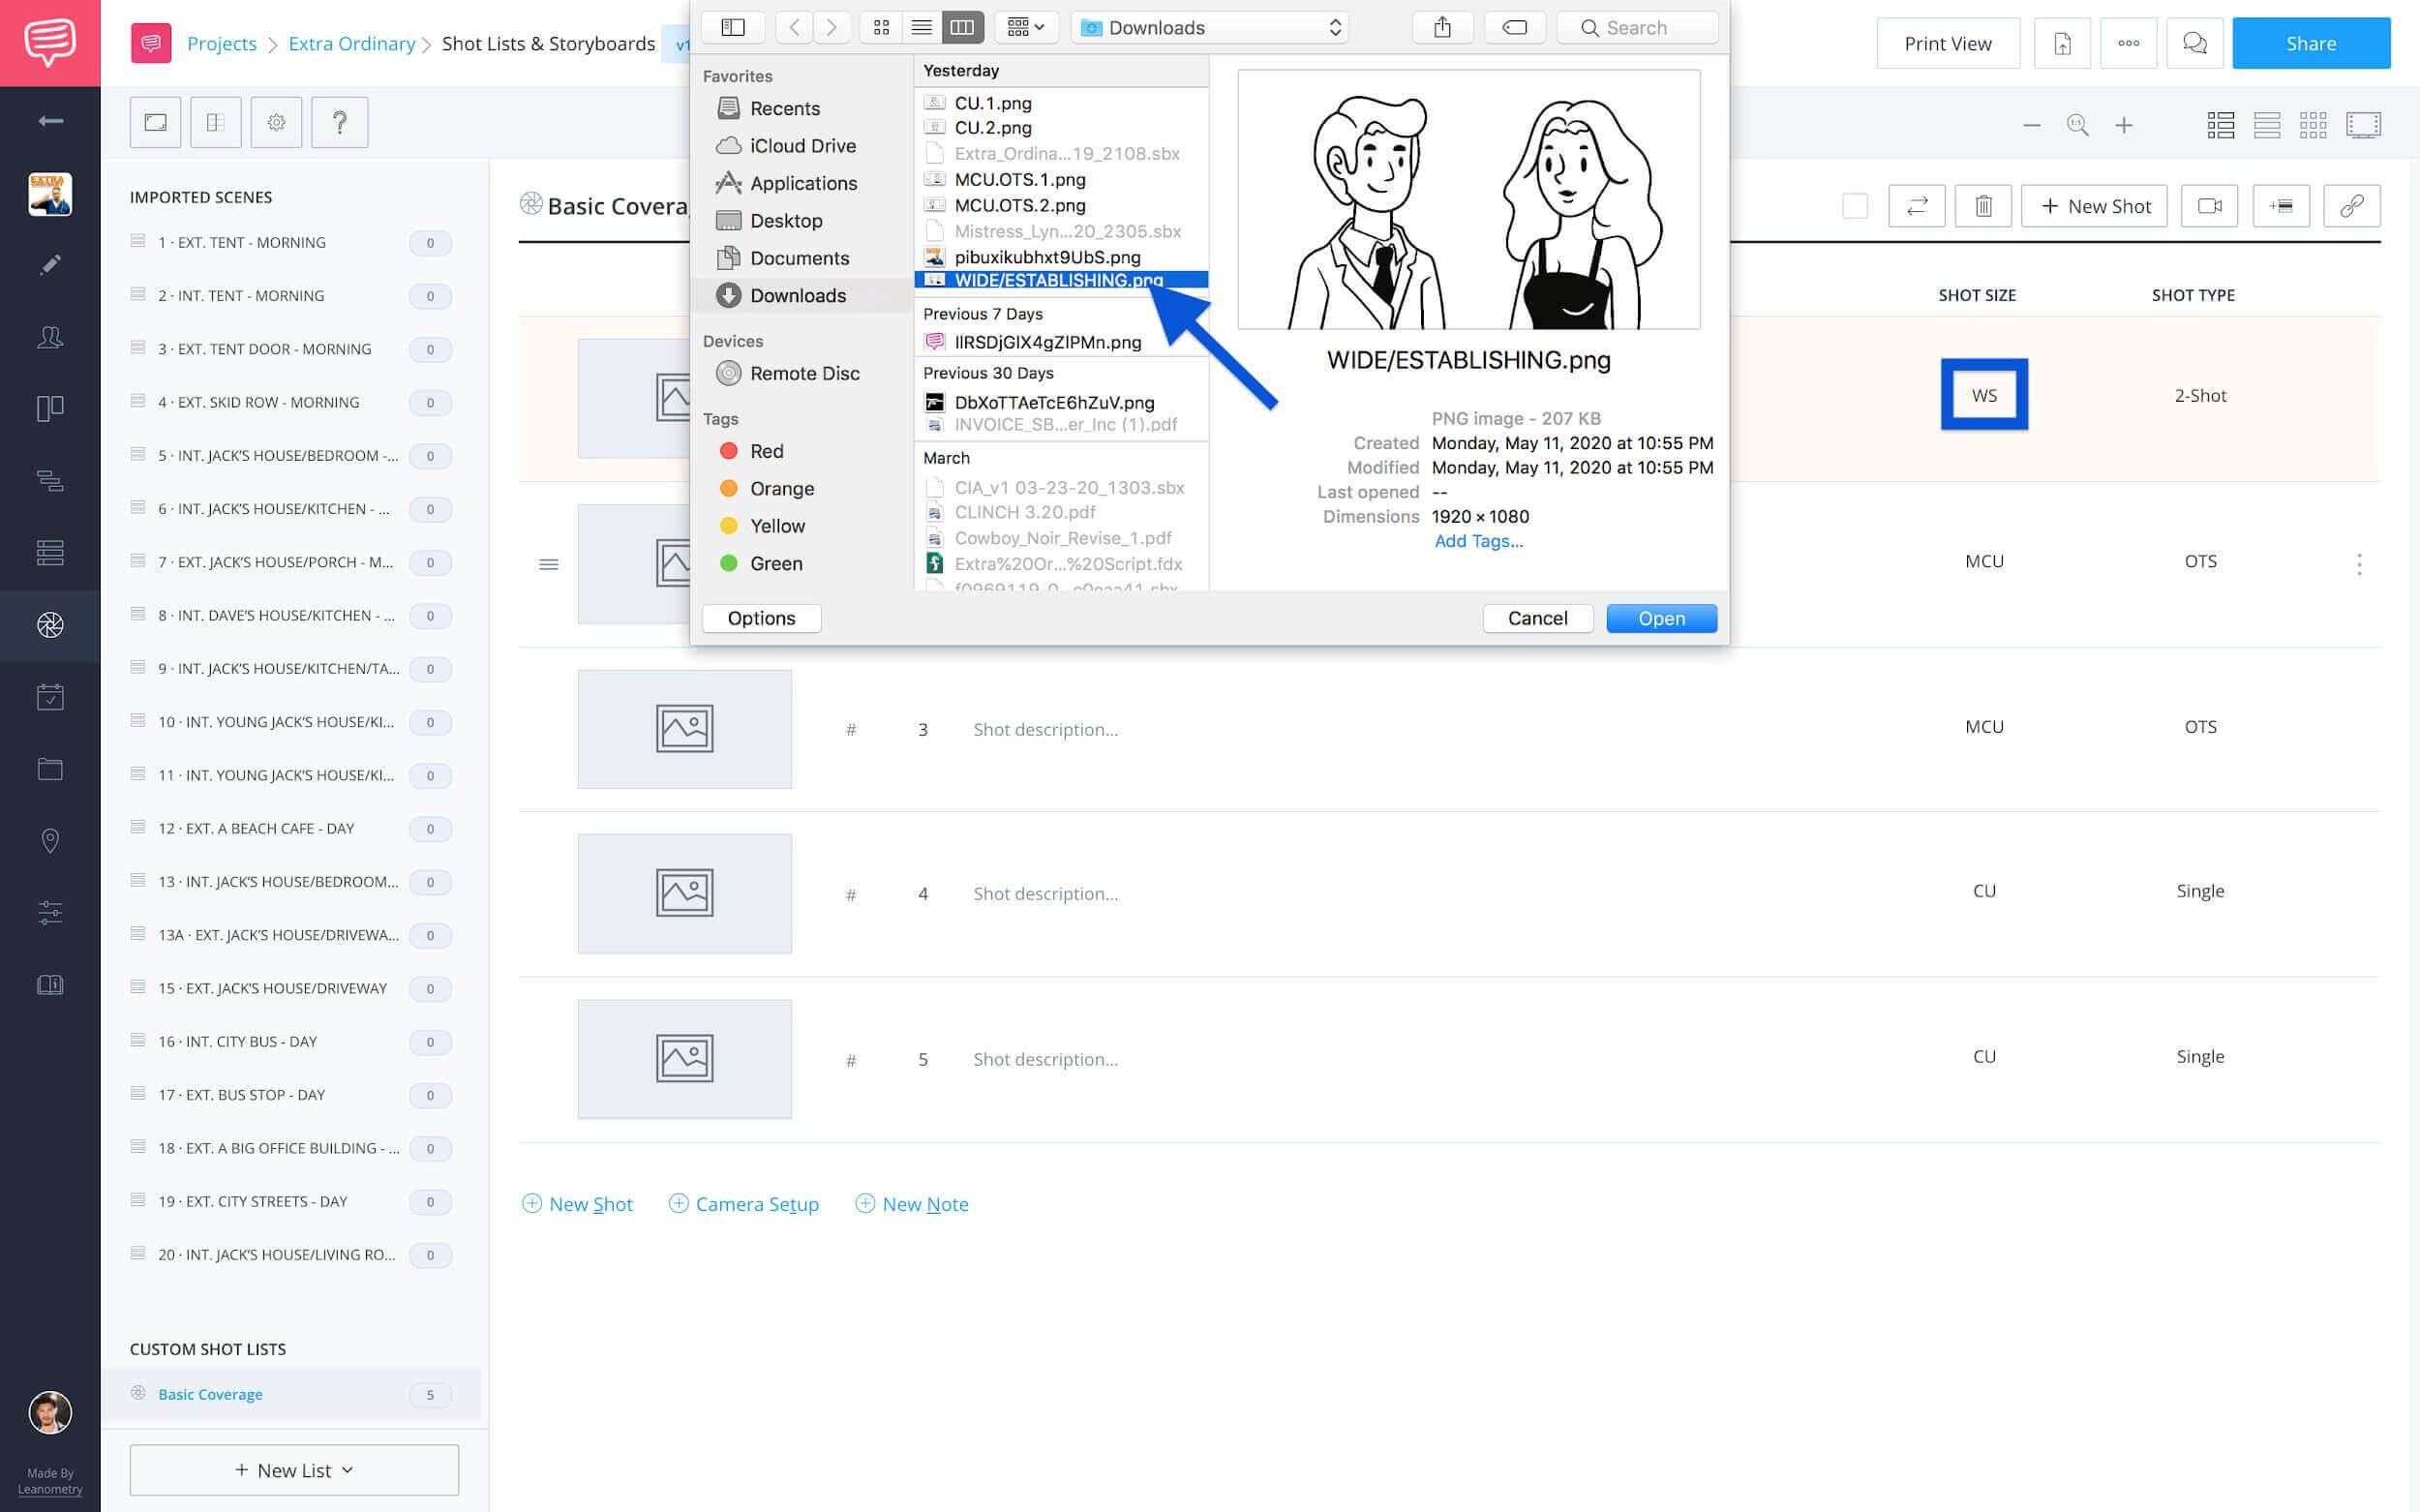
Shot List & Storyboard • Add Image
Confirm the image and click “Apply”:
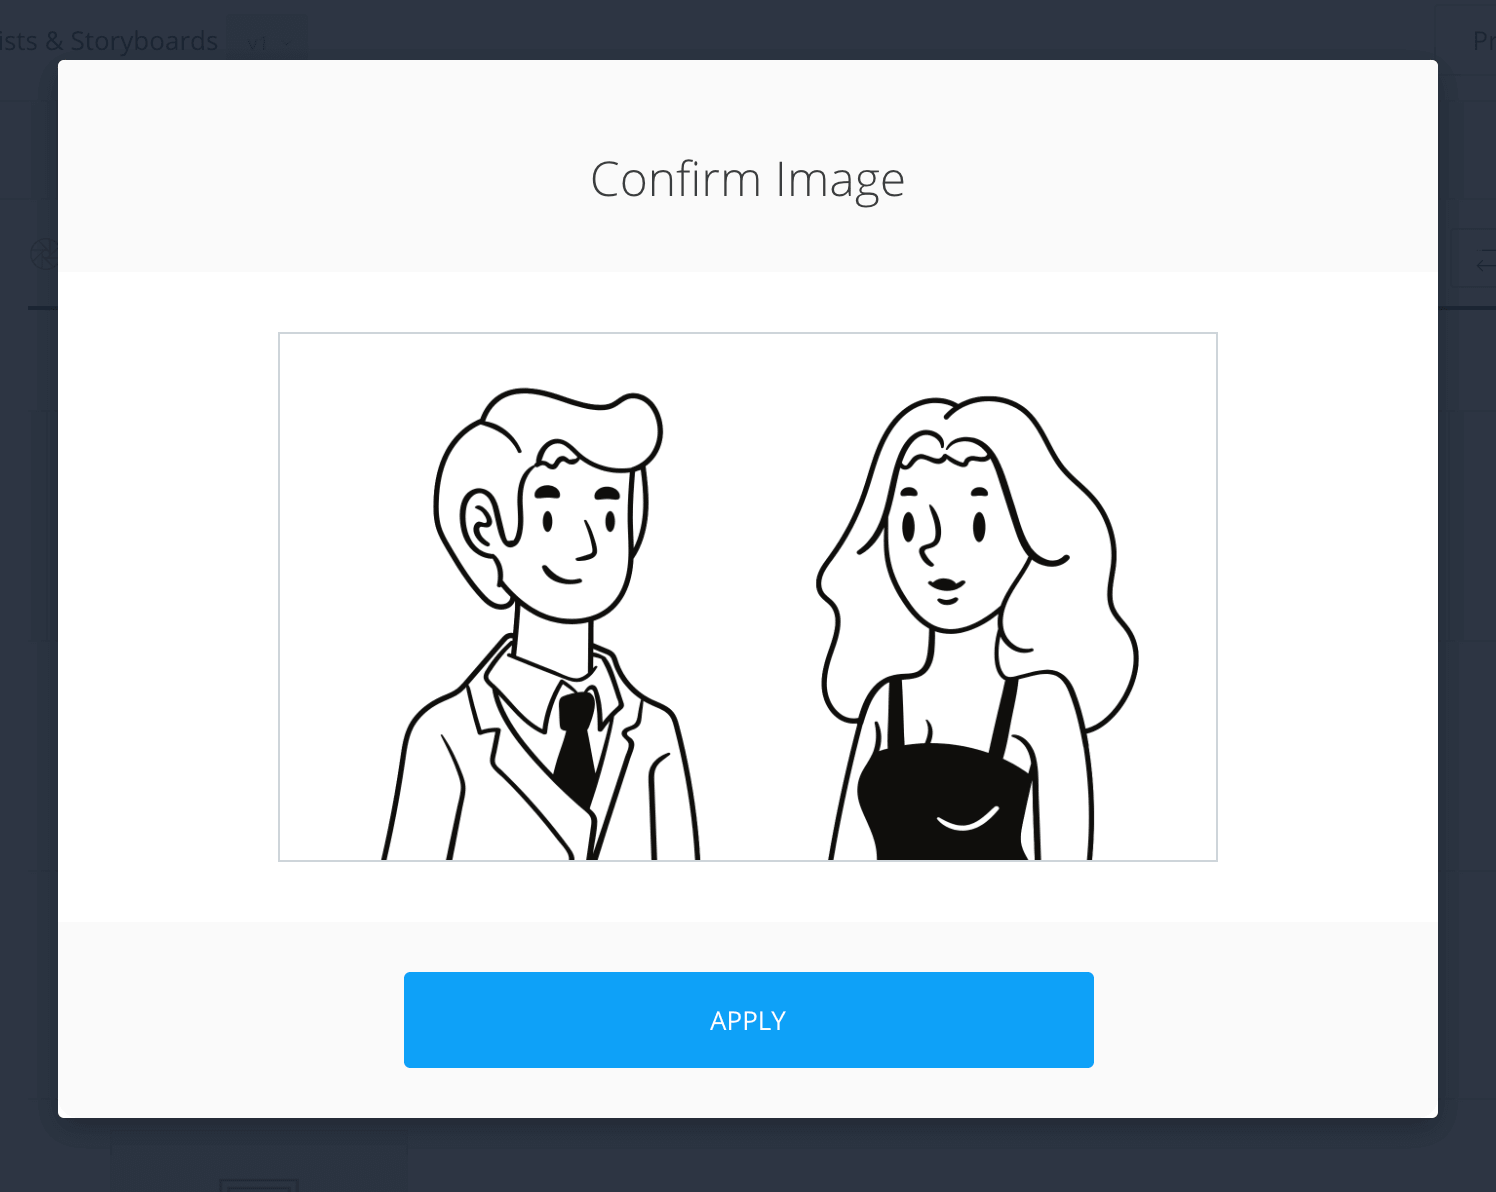
Shot List & Storyboards • Confirm Image
Repeat this process until all of your shots have reference images:
Shot List & Storyboards • Basic Coverage Template
Now we have a fully populated “Basic Coverage” shot list template, we can duplicate the shots as needed.
Duplicate Shots
Step 4: Duplicate and move
Now that we have a template ready, anytime we have a scene with two people chatting, all we need to do is duplicate the shots in the template, and then move them to the other scene.
To duplicate your shots, select all of your “Basic Coverage” shots by clicking the “Select All” box on the toolbar:
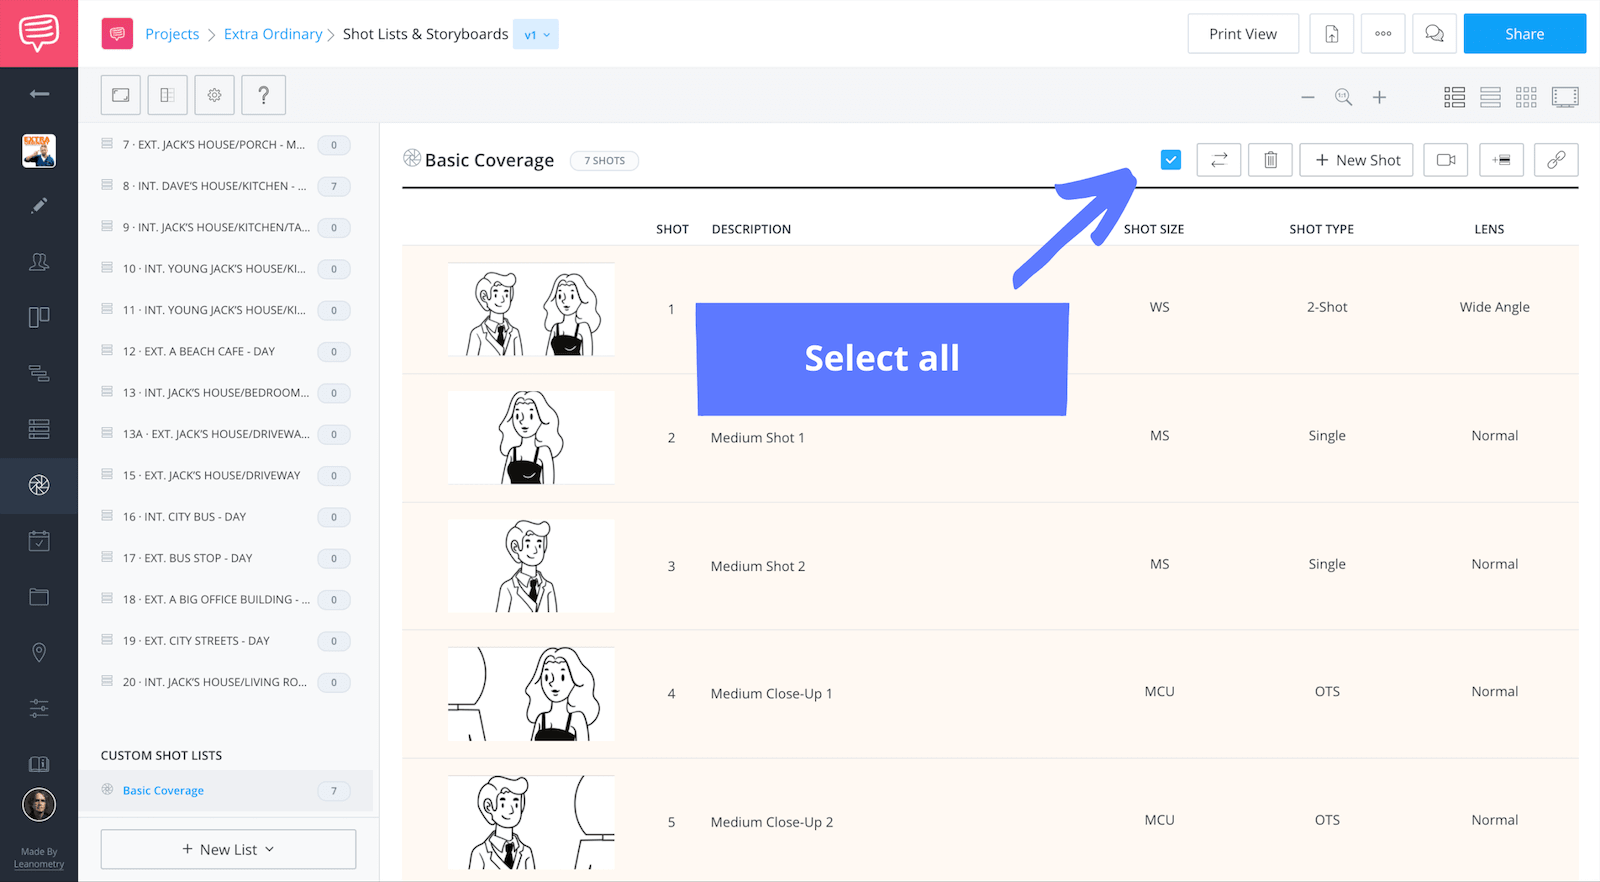
Shot List & Storyboards • Selecting Copied Shots
With all of the shots selected, use the hotkey for “Copy” for a Mac that would be Command + C, for a PC it would be Ctrl + C:
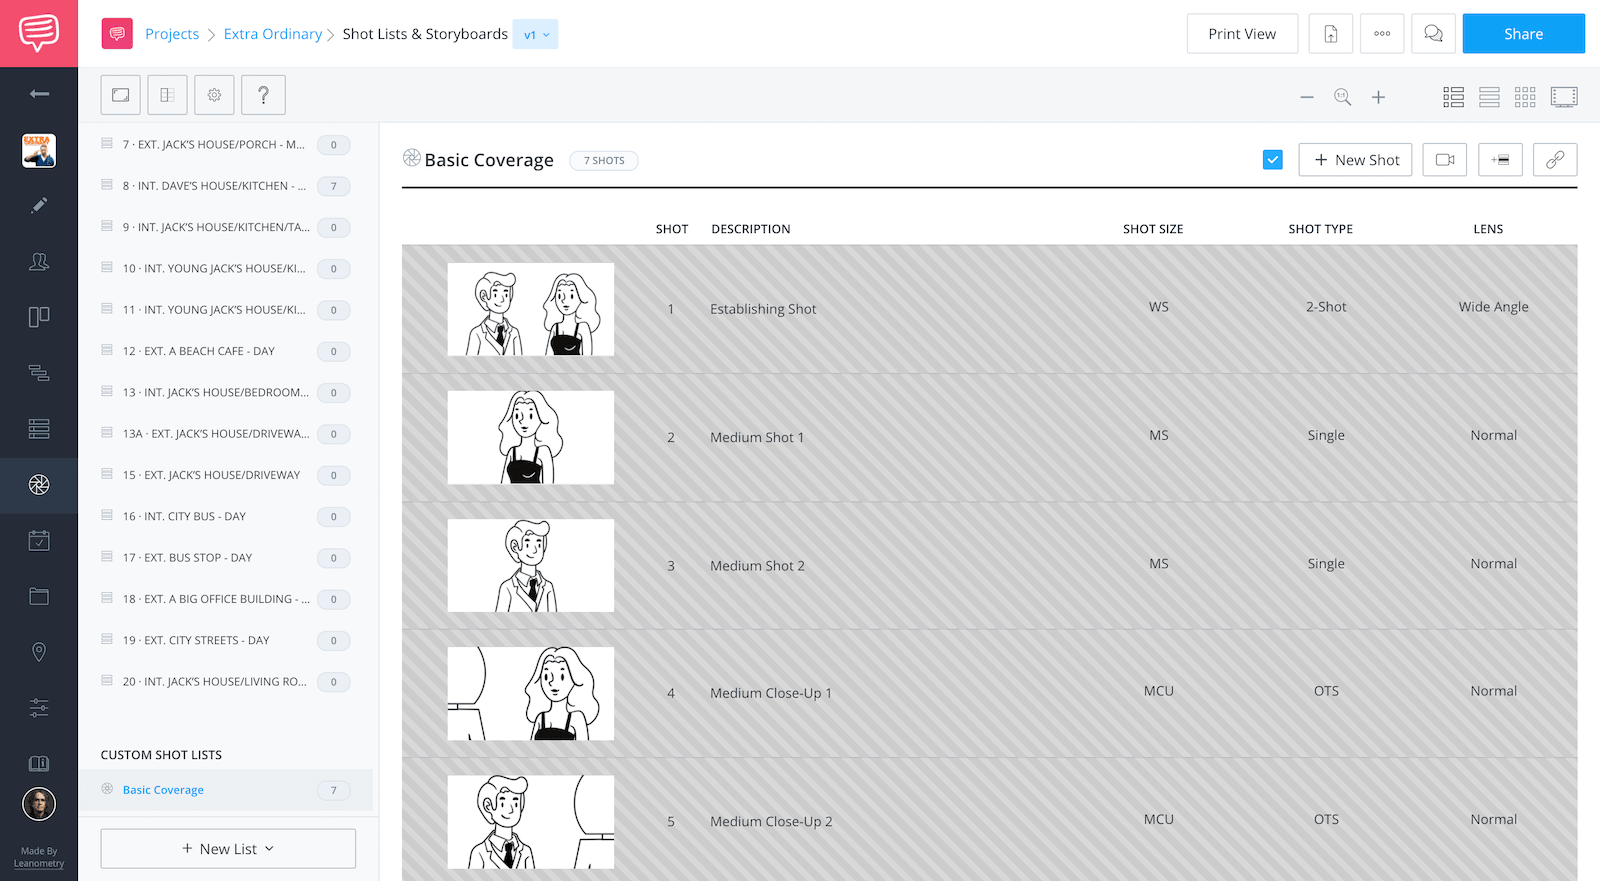
Shot List & Storyboards • Copied Shots
Now, paste the shots in the same list using the hotkey Command + V (Mac) Ctrl + V (PC) you should now have a total of 14 shots in your “Basic Coverage” template:
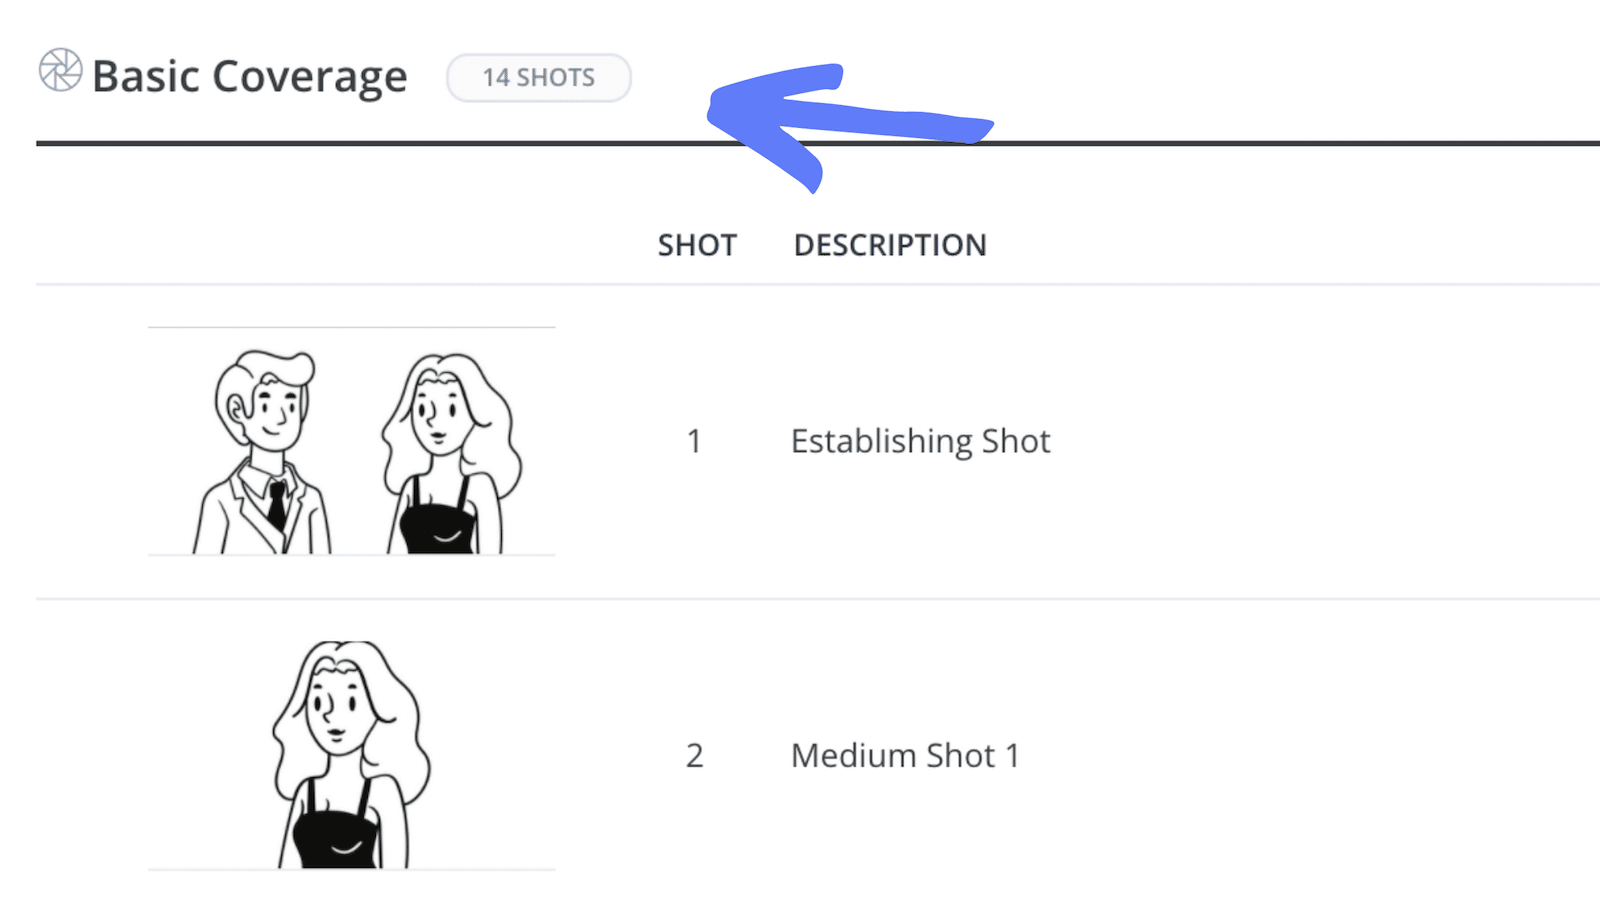
Shot List & Storyboard • Paste Shots
With the shots duplicated we can now move them to the scene(s) that they need to be in.
Select the shots you would like to move to another scene by clicking on the shot strip:
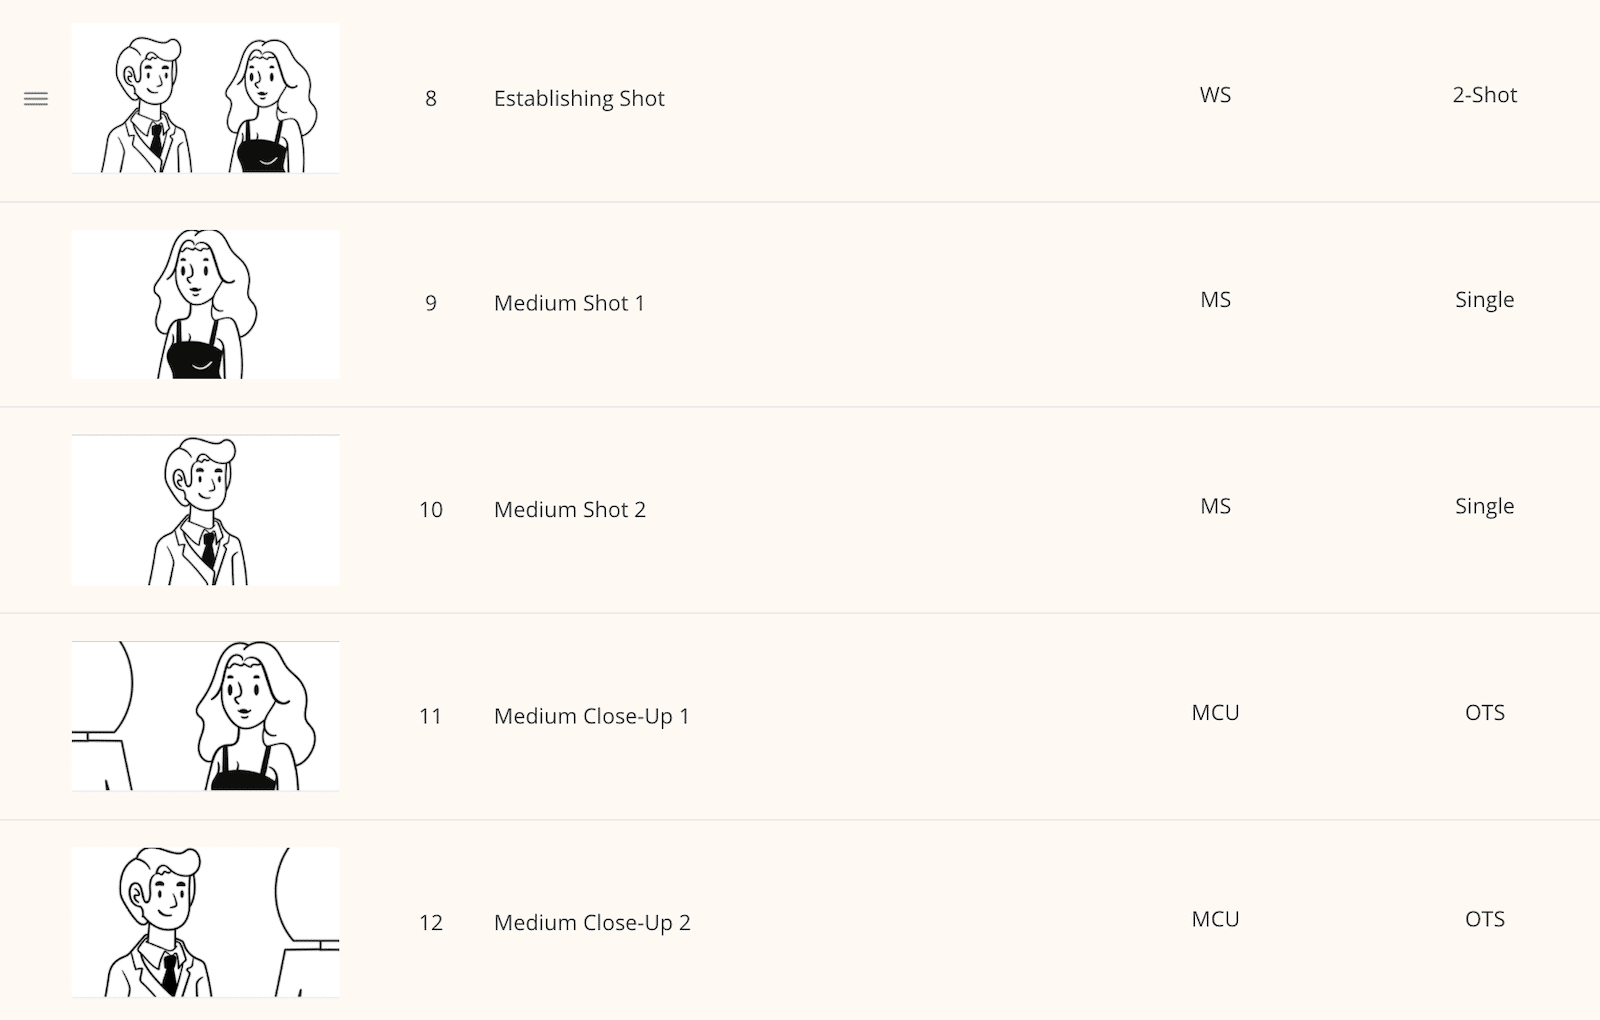
Shot List & Storyboards • Selected Shots
Now, click the Move button on the toolbar:
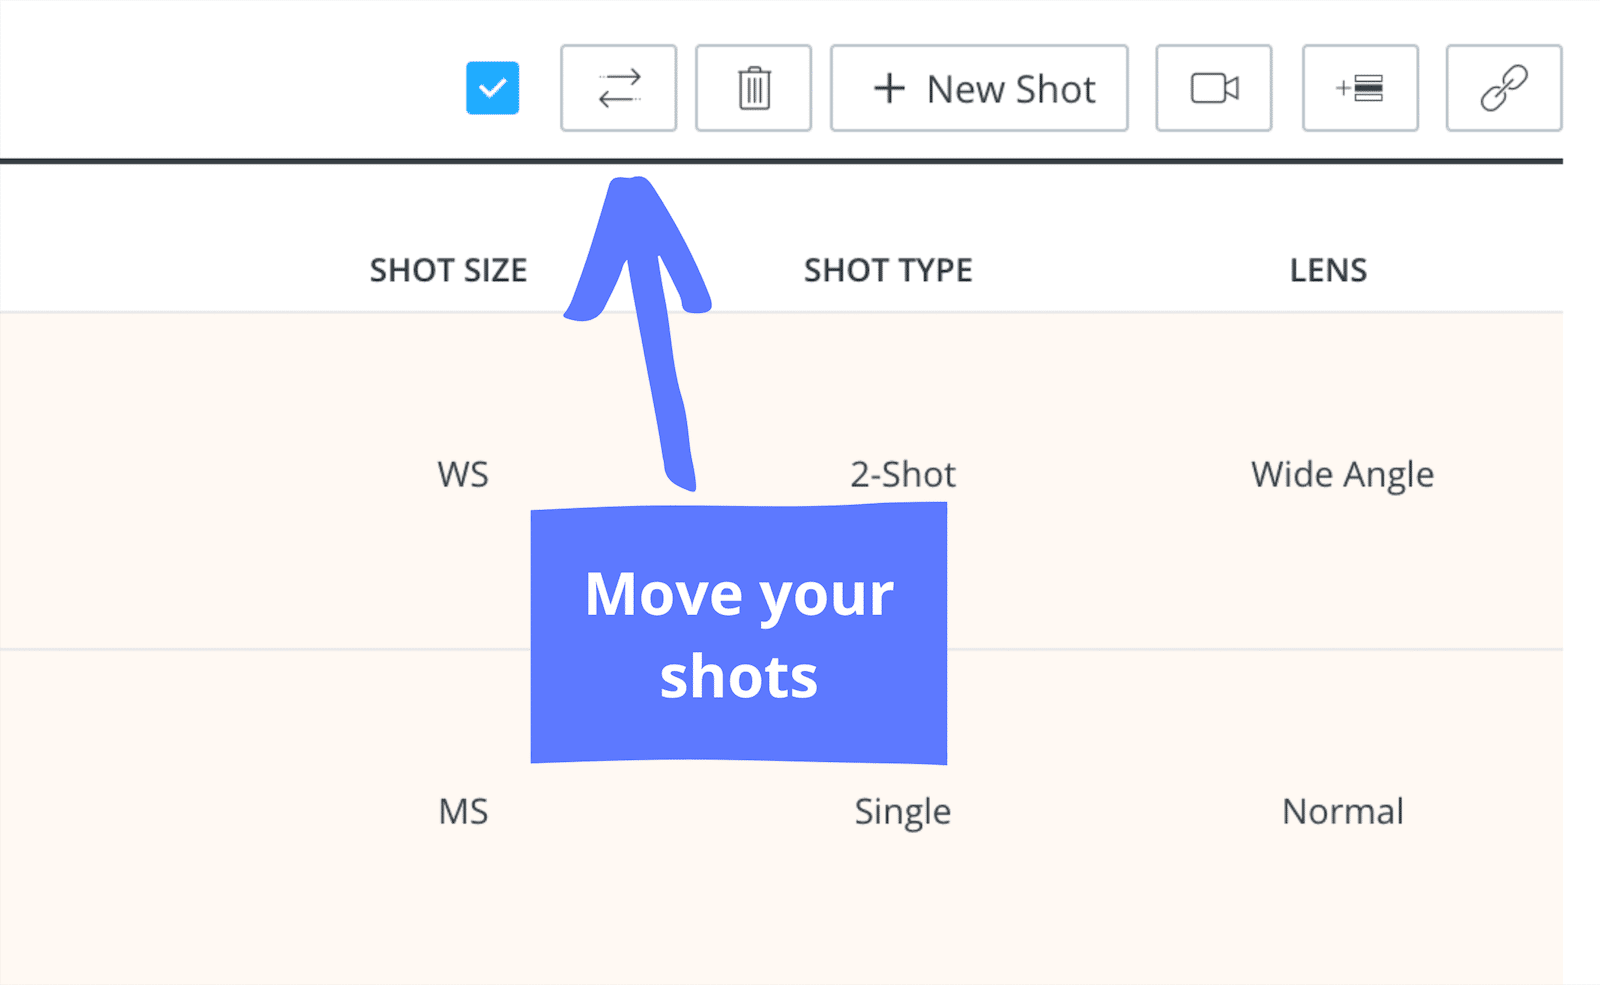
Shot List & Storyboards • Move Shots
In the pop up, select the scene you would like to move the shots to and click Move:
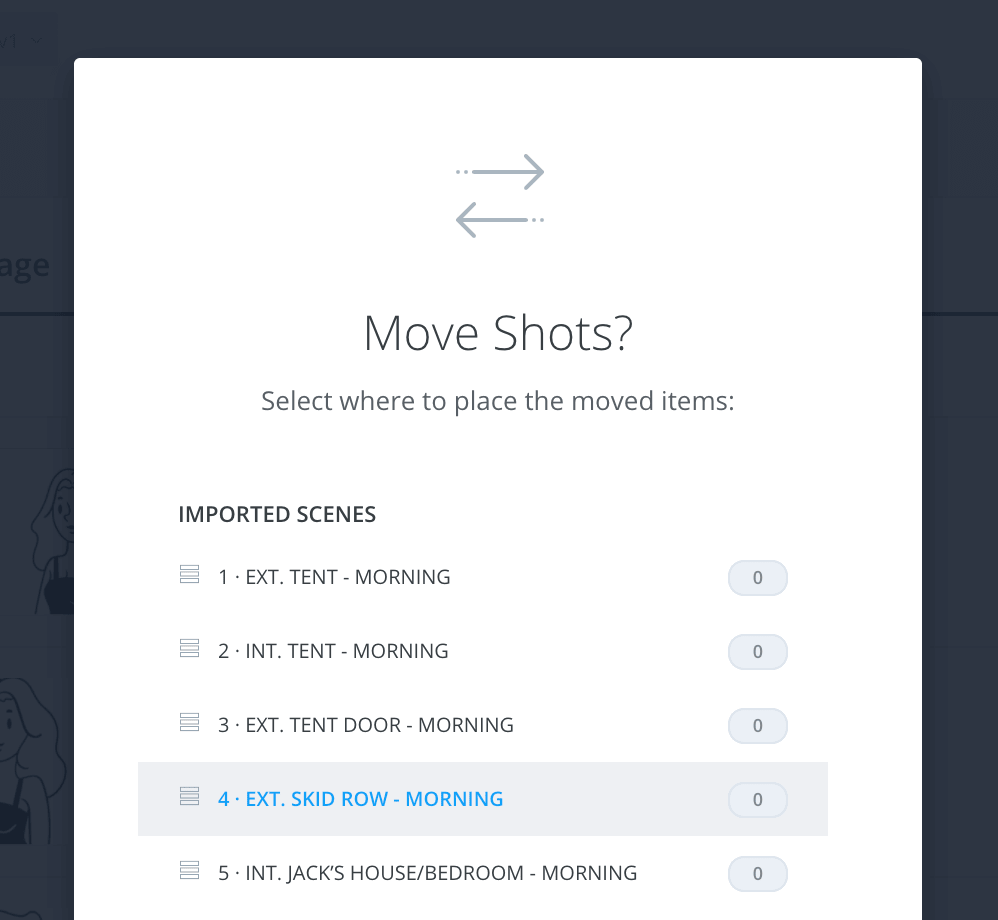
Shot List & Storyboards • Select Scene
If you’ve been following along with this example, repeat this process for all of your two-person scenes.
Make as many templates as you need.
No matter how you decide to create your shot list it’s going to take time, but by templatizing the basic coverage shots, this frees you up to focus more on the more artistic ways of telling your story.
UP NEXT
Create a free shot list here
Now it’s time to log in to your account and put everything you’ve just learned to practice. Get started by making your own shot list right now. What are other time saving tips when shot listing? Comment below!
Up Next: Create a Shot List →
Showcase your vision with elegant shot lists and storyboards.
Create robust and customizable shot lists. Upload images to make storyboards and slideshows.
